End of October Update

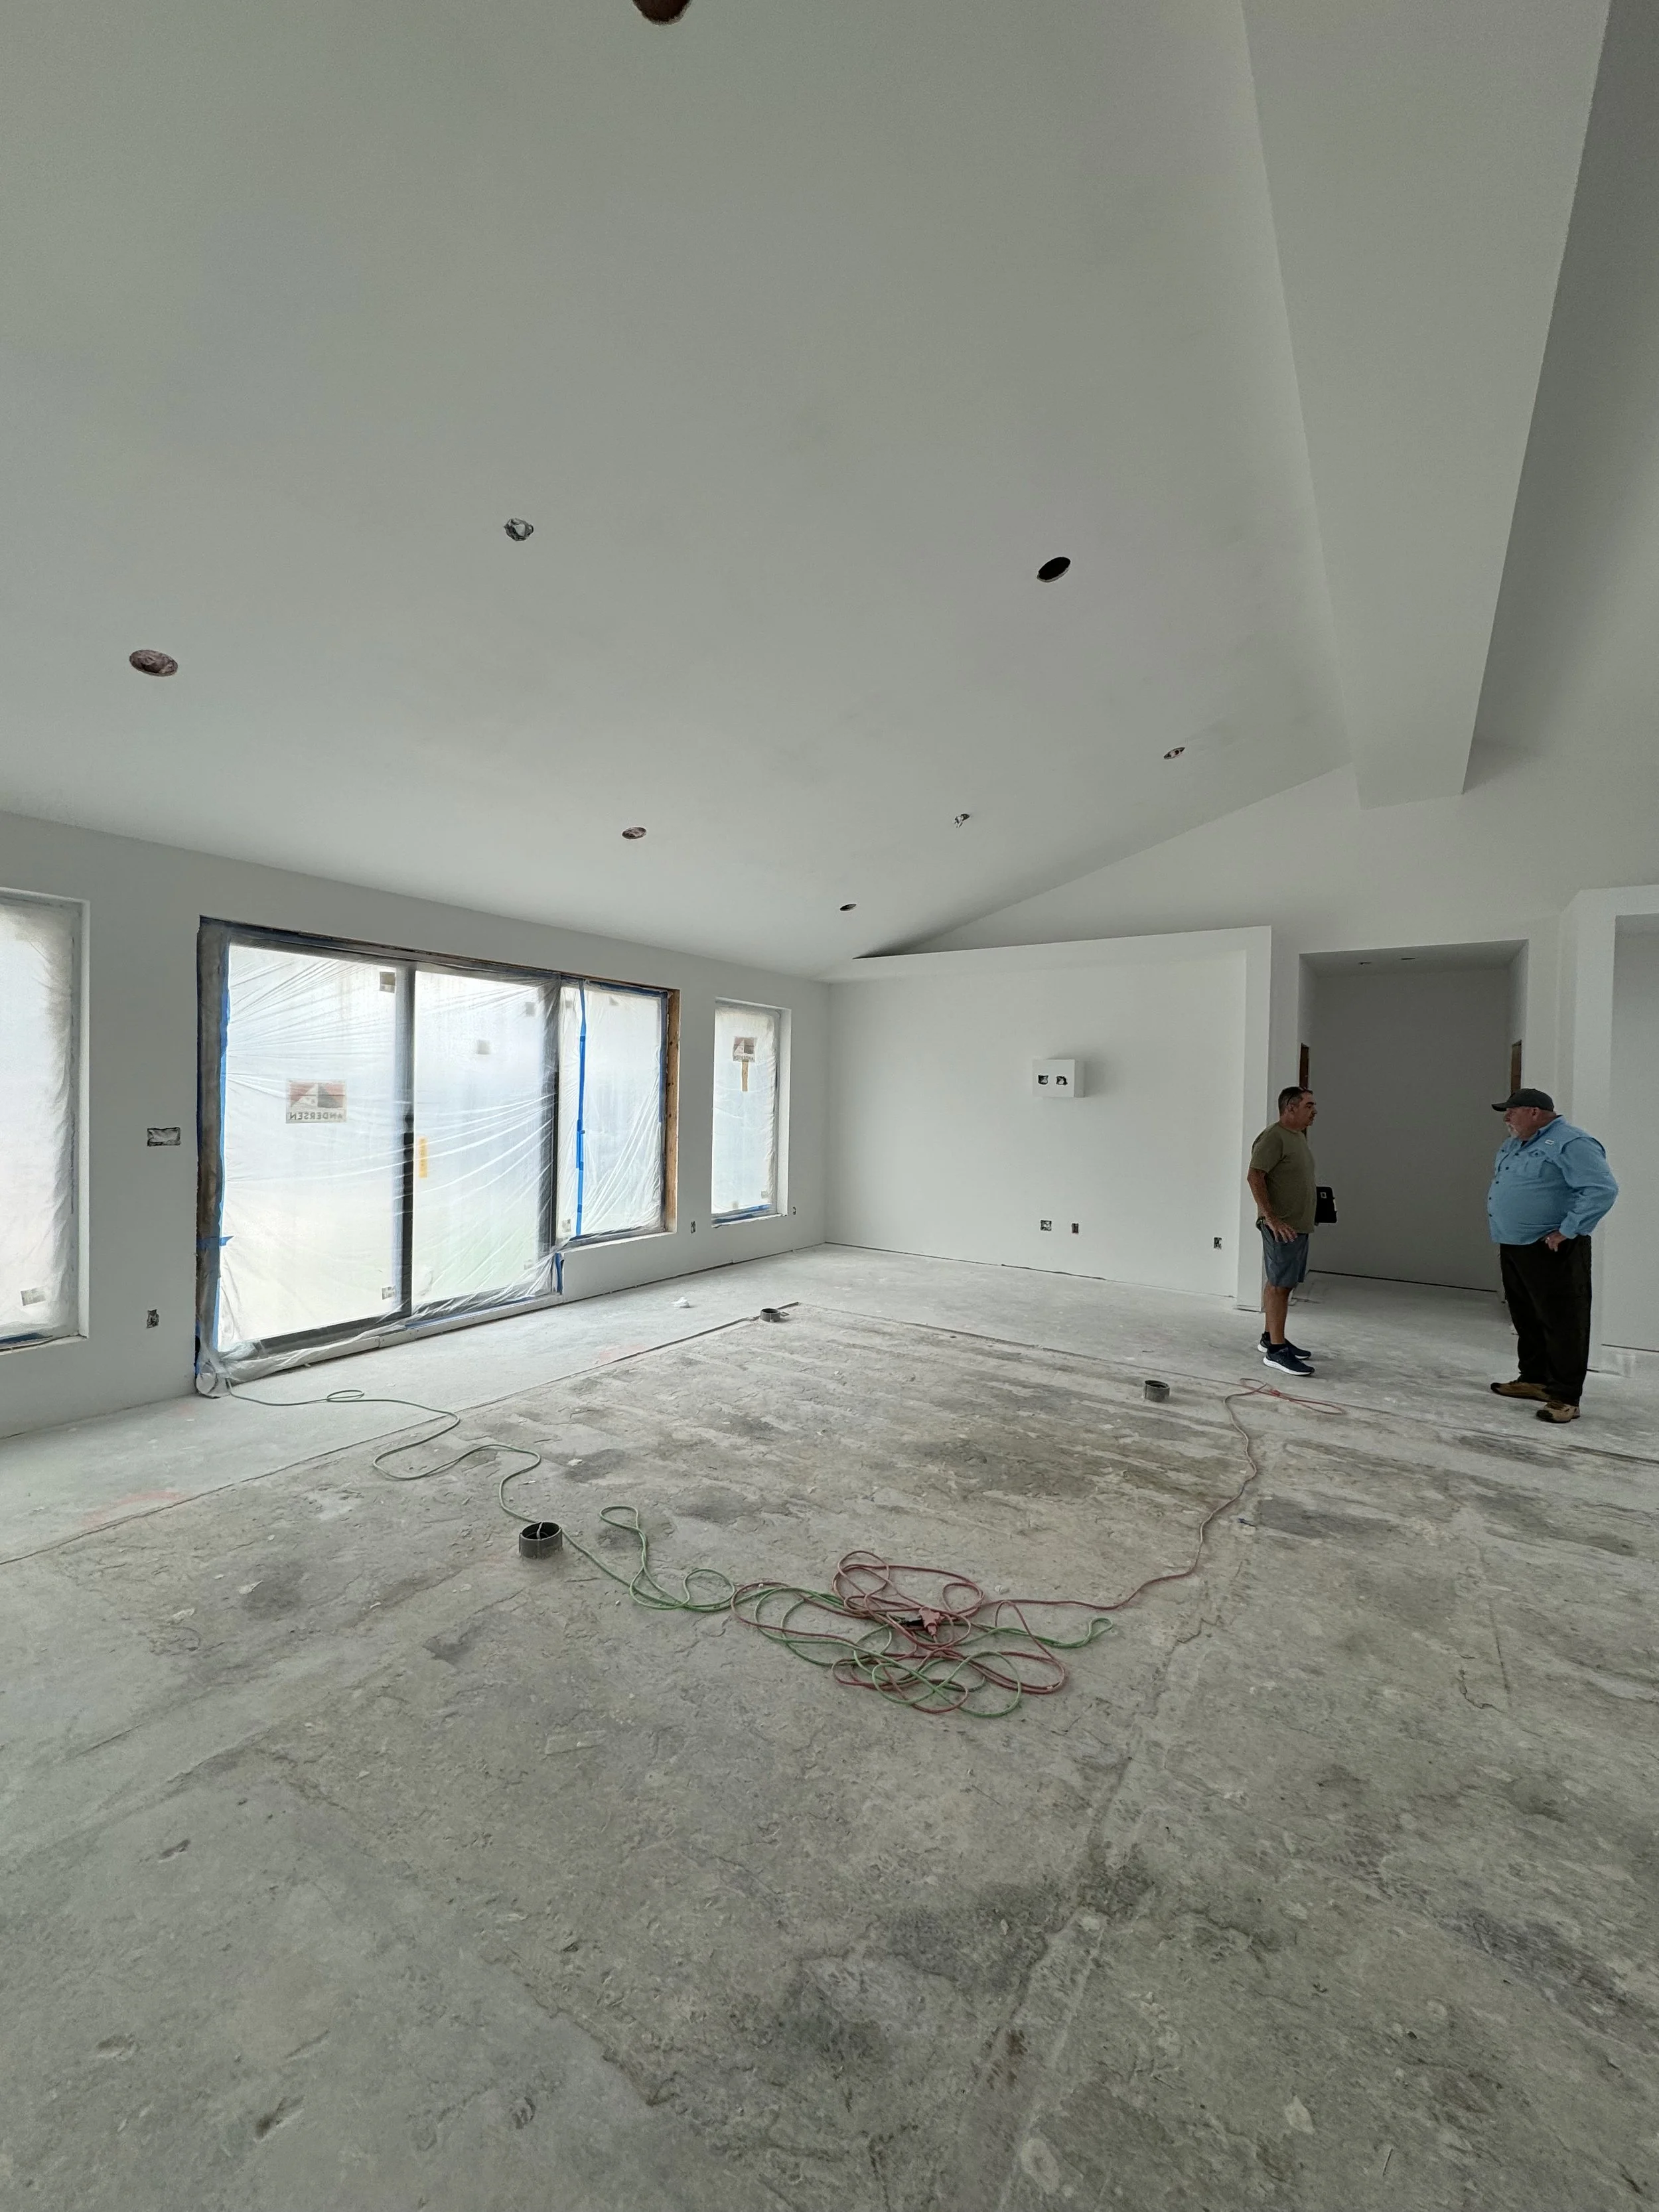
Wow - it’s’ been a bit of a crazy month. So much has changed in the house since the end of September. The builder is feeling very confident that they’ll finish in November. We also think that’s possible, but also realize there are a number of things still pending that may take longer than any of us expect. We’ll see.

Heated Floor

The first thing planned in October was to install tile in the bathrooms and utility room. We’d been expecting this for some time, but issues with ordering tile pushed it to October. While the builders were installing all the tile, we had elected to install a heated floor in the primary bath and it was our responsibility to install the heating cables after the subfloor was prepared by Carlos and his team (Carlos works for the builder).

Basically, part of the subfloor for this installation is an orange sheet that looks like a big Lego brick mat. The heating cables are designed to snap in between the raised sections. There are a number of rules & guidelines about placing the cable and how close to walls, plumbing, and other parts of the cable you can lay it. It’s not particularly complicated, but you can’t cut the cable (you buy it based on square footage covered) so you end up reworking things a bit to get it all fit well. There are also multiple temperature sensors that get put down.

When you buy the cable, they provide the factory tested electrical resistance of the cable. As you install it, you have to perform a number of tests three times. You do the first before you remove the cable from its spool. The second set of tests is after you’ve laid it out on the sub-floor. Finally, after the tile is installed, you do a final test. All of your results get sent back to vendor to activate your warranty.

Doug installing cable. You can use a wood trowel to help push the cable into place. We’re very glad we had knee pads as the orange subfloor is a bit hard on the knees.

All done and ready for tile!

Travis doing one of the electrical tests on a heating cable.

Tile

We had selected tile quite some time ago and it was painful at the time. Now that we’re getting close to seeing the final result, there is a lot of anxiety. It’s not like paint that’s pretty simple to change if you’re unhappy with the color. Tile is a much bigger investment.

Carlos and his team ultimately spent about two weeks installing all the tile. This included the same floor tile in the two full baths (and also part of the wall in the primary bath). We also had a blue/green accent tile in the primary bath. In the guest bath, we have glossy & matte versions of the same tile creating a pattern in the shower. The utility room and powder room share a blue floor tile. In the kitchen, we have one wall that’s all wavy white tile. Finally, in the dining room, we have a dark blue backsplash tile that ties into the kitchen island (hopefully).

To add to our selection trauma, we also had to pick grout. Luckily, our colors blend across the house so ultimately, we were able to use just two different color grouts (iron & warm grey), plus white in the kitchen.

The guys did a great job. In the end, we’re both really happy with all of our selections.

The guest bath.  The floor tile is supposed to look a bit like concrete.  The shower wall is slightly lighter green in person than this picture shows. The horizontal tiles are matte and the vertical ones are glossy.  

Backsplash tile in dining room.

Primary bath tile.  

This shows the (very dirty) floor tile in the powder room.  The same tile extends through the utility room.  It’s solid blue so all the brown you see is dirt and sawdust from cutting out back of vanity.  

Bathroom Vanities

Quite some time ago, we decided to order our bathroom vanities from a vendor on Etsy. He had beautiful hand-made stuff in his store. We bought the guest bathroom vanity first just to make sure they looked as good in person and shipping all worked out (the guy is based in Phoenix). We loved the first one so ordered two more (you’ve seen a preview of the powder room one in the photo above and the guest vanity last month).

This month we added the under-vanity lights for the primary bath. This one was a bit tougher because the vanity is actually three different pieces on the bottom (basically two vanities with a shelf “bridge” in the middle). We wanted to add the lights before the vanities were installed as there isn’t a ton of clearance underneath to do after the fact.

Now they are all fully installed, with countertops, sinks, faucets, and lights underneath . Yippee!

Doug testing out light segments during install.  We ended up attaching the lights on the two full vanities and created a section that we could easily snap on to the shelf section once it was installed.  

Guest bathroom with working plumbing.  You can see the under-vanity lights.  Now we just need sconces, mirror, shower glass, and towel bars and door knobs.  

Here’s the primary bath vanity. 

Plumbing

As you can see in some of the pictures above, Andy (the plumber) has also been busy this month. He’s been installing toilets, showers, faucets, garbage disposal, dishwasher, and tub. At this point, I think he just needs to install the drain and faucet in the workshop (he’s been waiting on us for that one) and a bit of caulk. He expects to do final plumbing inspection this coming week.

Cabinets in Kitchen, Dining/Living Room, and Utility Rooms

The carpenters have been busy the last several weeks completing cabinets in living room, kitchen, dining room and utility room. They had all the cabinet boxes everywhere except utility room last month. This month was all about finishing them out with drawers, doors, and trim.

We had a bit of s scare with the utility room as when he measured everything, non of the tile sub-floor stuff was in place. To get them into the room, they had to be carried in on their sides (two parts are over 90” tall). Then they had to be tilted upright. They ended up having about 1/4” of spare space when they flipped them up!

At this point, they are all installed, and everything has quartz where it’s supposed to. The paint team will end up finishing them with a sealant and a clear-coat finish. After that, someone (not us) will get to install a whole lot of cabinet pulls (108 total).

We just have one piece of quartz in the guest bath (window sill) that needs to be replaced. Not sure who installed (quartz people or tile guys), but they ended up having the slope the wrong direction. They’ll have to break it to get it out but luckily there was just enough quartz left to replace it.

Utility room cabinets.  

Kitchen cabinets.  The open space by the window will also have a door, but it has special hinges that raise the door straight up vertically.  This will be an appliance“ garage: to hide various small appliances.  You can also see our kitchen tile selection in the photo.  The vent fan has a “chimney” that covers the vent pipe but that can’t be put on until after final mechanical inspection.  

Finished Dining Room cabinets.  The open space on bottom will be a wine fridge.

Living Room cabinets.  We assume the last two bottom doors were installed yesterday after we left Houston.

Painters have also done a lot of paint clean-up the last couple of weeks so think they will just have some last minute fixes after the final floor sanding.

What We’ve been up to

While they were working on all the things above, we had a lot going on also. We already mentioned the floor heating system. After they finished the tile, we then had to finalize the heater system with the thermostat installation. This involved cramming a lot of cables (2 heating wires with two wires each, 3 temp sensors with two wires each, and 240v electrical with 4 wires). Travis had a blast!

We forgot to get any other photos, but here is a picture of the working thermostat.  It’s got wifi so we can adjust the temperature from anywhere in the world.  Who doesn’t need that???

Smart Lights

We have a number of “smart” light switches that we’ll be able to control in various ways. Some of them will automatically turn on/off at specific times. Others will be turned on by talking to Amazon Echo devices (Alexa). Some may also be activated by motion sensors. This month we installed a Lutron Hub that facilitates all of the above features. The primary reason for doing this now was that we really wanted our outside eave lights to come on at sunset and we kept on having to adjust the time manually as days got shorter. With the hub installed, they’re now programmed to come on at sunset and turn off at sunrise.

Speaking of that, we decided to change the color of the eave lights for Halloween. Normally they’re a warm white. We first tried switching to an orange color, but it didn’t really work that well with our bricks. We noticed quite a bit of purple for halloween around the neighborhood so tried that.

Our first attempt with orange lights

Our purple halloween eave lights.   Funny enough, we figured out our next door neighbor has similar lights as he changed his to purple just after we did.  

Workshop Cabinets

We had already talked about cabinets in the garage. This month we purchased the cabinets we planned for the workshop. We’re using the same cabinets as we have at the lake (New Age). These were delivered in early October and luckily we had “white glove” delivery. Basically they bring to whatever room you want, unbox, and take all the packing material away. These things are steel and weigh a lot!

We have three “lockers” on one wall and three counter height cabinets on another. One of these will have a sink mounted in it. As such, we ended up having to cut holes in it for the sink on top and the plumbing lines on the back. It’s a little nerve wracking laking an angle grinder with a cut-off wheel to a brand-new fixture.

Travis ready to cut.  It seemed likely that there we’re going to have a bunch of small steel fragments flying so good to be well covered.  

Cutting away.  What you don’t see here is all the flying sparks!

Here’s the back cut-out.  Not perfectly straight but good enough for us.  

For the counter height cabinets, our plan was to build another countertop from our old hardwood floors like we did for the garage. For this one, we weren’t particularly happy after we first got the floor boards mounted on the plywood. We had bigger gaps than on the first countertop but figured it was for a workshop and would be fine. We did use a better wood filler this time. We also picked a different stain color as we didn’t have to find something that didn’t clash with wood cabinet doors.

We won’t repeat all the photos of the building (they look remarkably similar to last time). That said, it turned out great. We both like it better than the first one.

The finished countertop on the base cabinets.  The sink drain and faucet still need to be  connected.

The three lockers.  We set them slightly apart so that we can put ladders and other tall things between them.  

Powder Room Wallpaper

More than a year ago, Travis found wall paper for our powder room. It’s pretty bold paper but we both love it. When we got ready to install it, we realized that how you buy wallpaper has changed since either of us had bought. When we ordered it earlier this year, we indicated the height and width of the space we’re papering (in our case, two adjacent walls in the powder room). What we didn’t realize was they they then print the wallpaper specifically for your space. In our case that meant we essentially received 9 pieces of wallpaper that is marked for where you make each cut. Luckily we specified enough height so there was enough to trim top and bottom of each piece. The way it comes means there can be no mistakes. If you mess up on one piece there is no extra to use.

On top of all that, we had a corner that we needed to turn. Typically when you do that, you end up cutting pieces off each of the pieces that go into the corner. We spent a lot of time trying to decide whether we could get the pattern to work out in the corner. Furthermore, the walls weren’t straight in the corner (very common) and that complicated figuring it out. Our pattern has a very narrow (1/4”) vertical white space periodically but we weren’t sure that it was wide enough to work with the non-straight walls. We ultimately decided we’d put a trim piece in the corner and moved forward.

We did start in the corner rather than at one of the ends as we figured that would give us the best chance of a clean match on the pattern. This paper is also different in that you paste the wall and then apply the paper (we’d only ever done paper where you pasted the paper, “booked” it for a while and then started applying). Ultimately it seems like the old way was easier, but we did get it all in place and so far it hasn’t fallen off the wall. 😀

The corner worked out well enough that we’re not going to use the trim piece. Overall we’re really happy with it. We’re confident that some folks won’t like the pattern, but that’s fine - we like it.

Doug installing 2nd to last piece of wallpaper 

The end result.  Just needs a couple of sconces, a mirror, and bathroom accessories (towel and toilet paper holders)

Alarm System

When we had all the low voltage wiring done, we included wires for two alarm keypads (one each in utility room and primary bedroom). Now that we’re getting close to being done, we had the alarm company come out and set things up (using wireless sensors for doors and motion detection). We used the same company Doug has had for years. They came out last week and got it all sorted in just a couple of hours.

An exciting photo of an alarm keypad!

Camping Chair Repair

Since we bought the house, we’ve had some number of camping chairs there whenever it’s been closed up. Currently we have three of them there. They’re all old and the feet on the bottom have started to get brittle (they’re plastic pieces that the legs attach to). Travis found some replacement feet on Amazon so this past week, he repaired a 2nd chair (which ultimately had 2 broken feet).

Travis Foster - master camping chair technician

Punch List

When it became clear how much was getting done in October, we realized that the builders might actually finish in November. We spent a couple of afternoons last weekend putting together a punch list of things that needed to be fixed/finished. We did this on a room by room basis and so ended up with lots of duplicate items (for example, every door needs a door knob so that would get listed for each room).

We ended up with a 201 item list - of which we owned 27 items ourselves. The vast majority of the list is pretty minor stuff. Some can be done before final floor finishing. Some has to wait until after.

It’s starting to all feel very real.

November

So - will they finish in November or not? Builder is confident they will. Doug feels like there is a good chance. Travis is less positive but thinks it’s possible.

Finishing up the hardwood floors will take a full week and very little other work can happen during that time. We are still waiting for the final plumbing inspection before we can request a gas meter. Our other requests to the gas company have all taken 4+ weeks each. But in those cases they weren’t going to be able to start making money as soon as they were done. Builder thinks we’ll get a gas meter in less than a week but if it takes much longer that drags completion out. Hopefully Glen (builder) is correct. There are several other final inspections that also have to happen but we don’t have any reason to assume they’ll be problematic.

We also have items on our punch list and several of them will be a bit time consuming. We’ve installed LED lights on vanities but we haven’t been able to do that anywhere where they need to finish cabinets. For example, the living room wall has a lot of sections to it and doing the LEDs there will be a bit time consuming.

On top of that, we’ve done absolutely nothing about packing anything at Travis’ house. It’s not a large house, but he has a metric-s^*2-ton (that’s an official moving industry term) of stuff crammed in every nook and cranny. On the plus side, we’ve been bringing items we’re using from the garage and leaving them at the new house. But there is sooooooo much in his garage, it’s still going to be painful.

End of September Update

The builder has mostly been focused on carpentry and tile prep activities in September.. During the same time, we’ve been trying to get some things done ahead of moving in so that we’re not buried in projects.

Cabinets

We came back from the lake after Labor Day to find a lot of cabinets installed in kitchen, dining room and living room (as well as all the utility room cabinets on site waiting for tile before they can be installed). This would have all be great news if everything was correct. The carpenter did a good job of getting good dimensions for all the cabinets related to appliances. Unfortunately, beyond that, he took a lot of liberties on size and much of it didn’t work for us. In the kitchen, he ended up having to modify 8 or 9 cabinets and move the whole island. Luckily he was able to do this quite quickly - about a week. Everything in living room was fine. He had to adjust several of the dining room cabinets also. Now that he’s made all those changes, we think they look great, although we don’t have doors/drawer fronts yet - so final verdict is pending. We had provided dimensions for everything so it’s frustrating that he didn’t pay attention to those and had to do rework (sure it was frustrating for him too).

Kitchen is mostly walnut cabinets with an island that is painted with some walnut shelves on one corner. Builder had his guys do the painting this week and it all looks good.

Meanwhile - the quartz folks have started work and currently have a countertop installed in the dining room. We expect the rest of the kitchen countertops today or tomorrow. Overall we’ll be using 4 jumbo slabs between kitchen/dining room countertops, bathroom vanities, utility room, shower niches, garage utility sink and bathroom window sills.

Kitchen. There will be additional cabinets in the white space on the back wall but they can’t go in until countertop is installed as they sit on the counter.

One funny thing is that the space on back wall facing the island is where the fridge will go. We both walked in, saw it, and were confident it wasn’t big enough to hold a fridge. We measured and all is good. We figured out that when cabinets are 9’ tall, everything in them seems a bit small.

Cabinets in dining room. The uppers will have doors on the two end cabinets and shelfs in the middle. Bottoms will have doors and a wine fridge on right cabinet.

Living room cabinets. The ones on the bottom will all have doors.

Closeup of one of the quartz slabs we’re using. This will be on all the vanities and countertops except for the island. From a distance it looks mostly white but close up there is a lot of subtle veining.

Large Patio Ceiling

The guys got the pine installed on the larger patio ceiling this month. We spent a bit of time trying to decide on stain colors - which is mostly just an annoying experience. We figured out that the color is so dependent on the wood it’s going on, you just have to try it on a specific sample. We ended up going with red mahogany and think it turned out great. We still need to install the 4 lights (very quick task) and a ceiling fan.

Patio ceiling after stain. We also have a couple of patio heaters that will hang from the ceiling.

Tile

Just UGH!

Tile is driving us crazy. We thought tile had been ordered more than a month ago and would be getting installed in early September. Turns out there was communication issues within the builder’s folks and it didn’t get ordered until early last week. It’s coming from 4 or 5 different locations so timing was quite uncertain. As it turns out, they did OK on delivery and as of this morning, all of it is at the house except for the floor tile for powder room and utility room (expected by Tuesday). Installation of tile in guest bathroom started today. Travis has had a few melt-downs over the tile delays

How we spend our time

While all the above is happening, we’ve been doing a bunch of things at the house. This is all stuff that we didn’t include in builder scope. We worked on a bunch of these items this month and have been really busy!

Closets

We had asked the builder to not install anything in closets except for the two linen closets. We planned on ordering closet systems from EasyClosets. We had experience with them from Doug’s house and at the lake. Basically, you use their website to design your own closets (or you can have them do it), and they manufacture and then ship to you. You install it yourself (they also can arrange to get it installed in many places).

Given we knew how it all worked, we were able to have builder install bracing so installation was simple (we didn’t have to worry about finding studs).

We had 70 boxes in our shipment that were delivered to our driveway. We spent one morning checking it all against what we expected and getting it moved to appropriate rooms (luckily with help from two of the builder’s guys). After that, we just went from closet to closet installing. We had a few damaged drawer boxes (5), some missing clothes rods (5), and two damaged risers, but they send replacements pretty quickly. We decided we had too many drawers, as they’re the most time consuming part of the install.

We had two closets that were all wall mounted (primary bedroom and gym) and two that were floor mounted as we wanted deeper shelves on those (guest and office). Only real problem we had is that we ended up with a wall outlet in the office that was right where the shelf at the top of the drawers sat. We ended up having to trim off the toe-kick section to get the shelf below the outlet. It worked out fine but was briefly a bit stressful.

How the closets started

Primary closet.

Gym closet. This will mostly be used for storing suitcases and travel stuff.

Guest Bedroom Closet (without doors). We set this up so folks can just set suitcases on the knee high shelf. There are also two small clothes rods on the left that aren’t visible in the photo.

Office Closet (without sliding closet doors).  This one still needs a bit of trim work done by builders.

Garage Cabinets/Countertop

If you’ve been reading, you know that last month we installed some cabinets in the garage.

This month, we added a tall storage cabinet behind the door going into the utility room. That was also Ikea cabinets and went quite quickly.

After that, we started work on the countertop for the larger set of garage cabinets. We had the builder same some of the hardwood floors they took out of the house during demo and for quite some time have had a pile of it in our storage unit. One of the uses we planned for it was to make countertops in the garage and workshop. This month we started the first section of that.

The section we were working on was about 8.5’ long. We pulled a selection of boards from storage and brought them back to the workshop to work with. Luckily about 90% of all the nails/cleats had been removed so we didn’t have to deal with too much of that. Unfortunately, they spent quite a bit of time outside in the elements but for the most part that didn’t seem to do too much damage.

We made our final selections and basically build a floor on a long piece of plywood. This part went reasonably quick - lots of sawing, glueing and nailing with a brad nailer.

After that, we did three or four rounds of sanding, followed by stain, tung oil, and finally 3-4 layers of wax.

Turns out a countertop made out of plywood and 3/4 thick oak flooring is heavy and unwieldy. That said, we did get it in and think it turned out really good. All in all we probably spent about a week on it (not full time).

Our stockpile of wood

Some of the 60+ year old wood cleats we removed

Plywood with first couple of runs of flooring.  The far end is longer than it needs to be and will be trimmed off to final length when we're done with installing the floor boards.

All the flooring secured (including front trim edge).  No sanding has happened at this point.

Doug sanding

Travis sanding.  

Final sanding.  We added wood filler for some of the gaps after the first couple of sanding so at this point we're taking off any excess.  

After stain

Travis buffing off wax (after several coats of tung oil).  

Completed and Installed!

Now all we need to finish is some trim around the bottom of the cabinets. Travis did some testing of various options there. Unfortunately, while cutting some small pieces of wood, one of them went flying and broke one of our workshop roll-up door windows. He was really annoyed with himself, but on the plus side, it’s a 20x36” window rather than an 8’ tall patio door that was directly behind him.

Our broken window.  Crazy thing is that it took about 10 minutes for it to finish breaking.  All of the cracks just sort of filled in over time and you could hear each piece cracking.  It's only the outer layer that cracked.

Accent Lighting

We have a number of places that we plan to have some LED light strips for accent lighting. We’ll use them for under counter lights over countertops as well as under each of the vanities. We also will have lighting in the living room entertainment center. We’d done work selecting which lights to use as well as controllers and power supplies. We’d also had quite a bit of stuff pre-wired so that we could control with smart switches in some cases.

First we installed the LED lights in the garage over our new counter-top. Those were straight-forward as we’d planned for an outlet in the upper cabinets. Unfortunately, we figured out as we were doing the lights that we had neglected to tie that outlet to the light switch at the door (we wanted the undercounter lights to come on with the ceiling lights). We looked at various ways to solve this but Travis found some Shelly mini wifi based relays. You can wire one into the junction box with the light switch and another into the box with the outlet. With some simple-ish configuration, you can have the first mini relay (connected to the switch) to trigger the 2nd one (outlet) to turn on power to the outlet when the switch is turned on.

Travis wiring the mini-relay into the switch box.  The outlet box was far easier as there wasn't nearly as much going on in that box and it was easy to stuff it all in there.  

We also decided to install the LED lights under the vanities since right now we could turn them on their sides since they’ve not been installed yet (refer back to tile delays). So far we’ve gotten the guest vanity and powder room vanity completed. The primary bath vanity is 10 1/2’ long and is composed of 3 pieces so will be a bit more work.

Guest bathroom vanity with lights installed.  Imagine we won't have them set that bright - they'll mostly be for night-lights/accent.  

For the vanities and under-cabinet lights, there will need to be a power supply and a controller in the vanity/cabinet to power/control the LEDs. Travis thought about and decided we needed some way to make all that a bit tidier. He got Doug to cut out boards on his laser cuter with slots for velcro strips as well as screw holes to secure the controller as well as to attach the French cleat that we’ll use to hand the board on the wall of the cabinet. Not necessarily pretty but gets everything confined to a small space at back of cabinet.

Example of one of the boards Doug cut out to hold power supply and controller

Unfortunately, we had originally thought we wouldn’t do the LED lights under the powder room vanity. We changed our mind. As such, we did not include an outlet for the inside of the vanity and had to install one. Luckily, there was an outlet directly on the other side of the powder room wall in the office. We were able to quickly (about 30 minutes) cut through and install a new outlet in the powder room.

Travis mid-way through cutting out the outlet hole.  No picture of the finished product - but we assume you've seen outlets before (it looks a LOT like the one higher on the wall.  

Major Milestone

One final thing we accomplished this month is moving the internet into the house. You may remember after demolition that Travis built out a box to hang on the fence that would hold our cable modem and router. This allowed us to have security cameras onsite so we could keep track of what’s happening there. Shockingly, that worked perfectly through very cold and very hot temperatures. Now that we have closets installed, we had a place to put the cable modem and router inside the house and were able to retire the outside box (as well as turn off the temporary electric service which was only being used to power the internet stuff at this point. The box even survived our derecho storm (where the fence it’s attached to blew over) and Hurricane Beryl.

Travis removing the router and modem.  You can't tell in this photo but the fence is broken into sections that are held up by 2x4's.  A task for October is to start getting fence estimates.  

End of August Update

Here’s a quick update on what’s happened at the house in August

Outlet & Switch Work

We worked throughout the house to wrap up low voltage outlets. These include things like ethernet, coax, telephone, audio (speaker) and video (HDMI) cables. We have these in a number of rooms and they all have slightly specialized outlet covers. Now that paint is done, we’ve installed all of these.

At the same time we went through and installed all the switch plates that Doug laser engraved. Almost every switch has a switch plate indicating what it controls. While doing this, there were a number of places where the boxes weren’t completely level so we had to make adjustments so they were level to our satisfaction (apparently we’re a bit pickier than the electricians).

We also put plate covers on all the electrical outlet boxes throughout the house. Unfortunately, we’d made a stupid error. Travis picked the outlet for the electrician to use and we purchased them. He selected them because they are pretty easy to wire up and have a lot of nice features. Unfortunately, what we didn’t realize is that the outlet has tabs at the top and bottom (above the screws that screw into the outlet box) that provide more stability against the wall. These tabs are optional and can be cut off. For our outlet covers, they needed to be cut off. Had we realized this, we could have had the electricians do this while installing. Instead, we had to unscrew each outlet and cut the two tabs off. It was slightly painful and time consuming - although Travis got into a rhythm and found a good process to do it as quickly as possible while Doug followed behind installing outlet covers

Example of a laser engraved switch plate - this one is for the dining room

Travis using electronic level to test level on a switch box

Travis trimming bathroom vanity electrical outlets with sheet metal shears - he’s having as much fun as you’d expect

Hardwood Floors

While we expected that August was going to start with tile floor installs, tile wasn’t available and they ended up doing all the hardwood floor install instead. We’ve gone with 2 1/4“ white oak “select” floors (a fairly typical choice for the timeframe of the house).

The crew got them installed really quickly except for a few places near doors where they had to do some work to remove excess subfloor material (mostly just a bunch of sanding). After that, they did two rounds of sanding. With that complete, they are done until just before we move in when they’ll do a third sanding with very-fine sand-paper and then stain & finish. The floors look great already and we’re really happy with our choice there (although we still have to pick a stain color!).

Unfortunately, they confirmed they’ll have to raise our front door somewhere between 1/8 and 1/4” as clearance is really too tight.

Main room floors after two sandings.

Electrical Monitors

We spent 3 or 4 hours one weekend installing electrical monitoring equipment in our 3 electrical service panels. These things basically have sensors that you connect to any individual breaker you want to monitor. Between the 3 service panel, we installed sensors on 24 breakers. We have an app that allows us to monitor usage at whatever granularity you’re interested in seeing it.

Our plan (who are we kidding - it’s Travis’ plan) is to use this to help determine what exactly we can keep running during outages (in our case with solar backup batteries - but you could also use to help manage generator loads).

Report showing last week usage - keeping in mind the only things running in house are ACs and lights

Patio Ceiling

The last week of August, Carlos (does a lot of carpentry work and will be doing the tile) installed the pine ceiling on the larger of the two backyard patios. This ceiling is vaulted in two different direction and also has a small flat section. We didn’t envy him. He’s having to coordinate with plumber on one of the gas connections for a patio heater but the picture below gives you an idea of what it looks like before stain (which we’ve not selected).

Patio Ceiling in progress

Gas Line

In our next step to try to get a gas meter, the plumber (Andy) had to install the underground gas line that connects the front of the house to the back of the house. He had elected not to run this through the small space in the living room ceiling. Basically they just dug an 18” deep trench from the back to the front and buried a flexible gas line (along with a wire that allows the utility marker folks to locate it). Of course it rained for several days while they were doing this work so that made it just that much more fun.

Gas line trench

With that completed we passed our gas inspection but Andy still needs to connect the hot water heater (and perhaps a few other things?) before we request the meter.

Garage & Workshop Epoxy Floors

From day one, we’d planned on doing epoxy floors in at least the garage, and probably the workshop. The garage had quite a few cracks in it and also had a bunch of built up glue that had held a ramp up to the kitchen door in place. We’ve both done the epoxy DIY kits in our houses with mixed results. It’s hard to do as much prep as you’d really like and we’ve found that long term results haven’t been fantastic.

Travis did some research and got some quotes and we quickly realized it probably made sense to have it done professionally. While certainly a bit more expensive than DIY, they offer a much higher quality product than the DIY kits. They also have the right tools to properly prepare the floors.

We hired a company and they installed in both the garage and workshop over two days. The first day was doing prep (cleaning, grinding, patching cracks, etc.) and installing the epoxy coat and colored flecks). The 2nd day they do clean-up from the flecks (they install a ton of them and so there are a lot of leftover flakes to scrape up) and then install a clear polyaspartic coat, along with anti-slip material. The first day took them about 2 hours and the 2nd day they spent less than 90 minutes. There were 3 guys and they hustled!

The floors look fantastic. There is no sign of any old cracks.

Our only complaint was that when we were installing garage cabinets, we found that any screw we dropped got lost on the floor due to the colors we selected. Still worth it!

During prep. They’ve done grinding at this point but haven’t patched things (you can see a chip in the middle of the driveway “lip”.

Completed garage

Workshop just before top-coat.

Other Garage Activities

You may remember that the bottom panel of our garage door had the wrong size glass. They had re-ordered and replaced that quite some time ago, but we had noticed that the glass on the replacement wasn’t quite the same. At first, we hoped that it was just that the others were dirty. Ultimately we decided that wasn’t the case and asked the company to send a replacement. They did that this month but when the guy was at the house to install, he realized that the old one was installed backwards in the door at the factory (they are double pane windows and only one side is frosted). You had to look really close to notice it was backwards, but it did impact the “color” of the window slightly. Once he flipped it so it was the same as the others, all was good.

Last week, we installed cabinets in the garage. These are Ikea kitchen cabinets so we had the joy of putting them together! We still need to get a few cabinet doors that were out of stock and we need to add trim at bottom to hide the top of the feet (we elected to install them slightly higher than typical kitchen cabinets. We will be making the counter-top for the larger section of cabinets using the original hardwood floors from the house (we saved some amount of that). We’ll use quartz remnants for the section with a utility sink. We hope to start wood counter-top build next week. We’ll also be installing a couple of wall cabinets that will fit behind the door from utility room.

Larger section that we will have the home-made countertop. You can also see the under cabinet lights in this photo - more details on that below

The sink section of cabinets is toward back near the door to utility room

Lighting

We are planning to install LED strip lights in a number of places in the house:

  • Under vanities in primary and guest baths

  • Under cabinets in garage and dining room bar cabinets

  • In the shelving in the living room

  • Above the soffits in the living room and kitchen

Since the soffit work is complete and they’ve been painted, we decided to go ahead and install the LED lights there. These will mostly just be decorative and will provide a “wall wash” of light along the wall above the soffits. We’d done a bunch of testing much earlier so we mostly had things ready to go and this ended up being pretty simple other than having to do some of it at night to get best light “color” and appropriate dimming level. Unfortunately, when taking a photo, it always looks much brighter than it is in person (we can’t figure out why).

Travis working on soffit lighting

Finished lights which look too bright in this photo

Cabinets

Last week the carpenter started delivering cabinets he’s been working on (after we left to come up to lake). We’ve included a few pictures below but we’ve not seen any of this in person and so far it’s all just “boxes” without doors/drawers. We’re excited to see them Saturday when we head back to Houston.

Base cabinets in the living room. These will have shelves above them. The yellow is just highlighting Glen our builder had used to highlight a question he had - it isn’t there in real life.

This cabinet in middle ie either for the wall oven or microwave

Neither of us can figure out for sure what this cabinet is for. The lighter color one in the back is for the utility room

Upcoming Work

Cabinet install is currently in progress and we expect tile floors to start soon. Presume once cabinets are in place, they’ll be ordering quartz for countertops in kitchen and bathrooms.

We’ve ordered closet systems and those will be delivered in about a week. We’ll be installing those ourselves (not in builders scope).

End of July Update

At the end of July, things are definitely moving forward, but there are still a number major things that need to happen.

Paint

The builder’s guys have mostly been focusing on paint over the last month. All exterior paint is done and as of this week, the vast majority of interior paint is finished (although there will definitely be some touch-up that happens as they wrap up things on the house.

We’d selected interior paint colors back in May or June but obviously hadn’t seen it all come together until this month. Luckily we both seem to be really happy with our selections.

Trim has mostly all been painted. Exceptions are in garage & workshop and a few places that will happen after cabinets go in. We also have a warping issue with the two sets of pocket doors and those will have to be replaced.

Guest bedroom. One wall is dark and the other three are a light green/grey color (actually looks a bit lighter in person than in this photo).

Utility Room (powder room is same color). Right wall will be solid cabinets

Kitchen - it’s hard to tell in photo - the dark accent color is a very dark navy. The kitchen island will be the same color. The area underneath the dark accent will be all walnut cabinets.

Living Room - same accent color as kitchen. Area under the accent will be full of living room built-in cabinets & shelves.

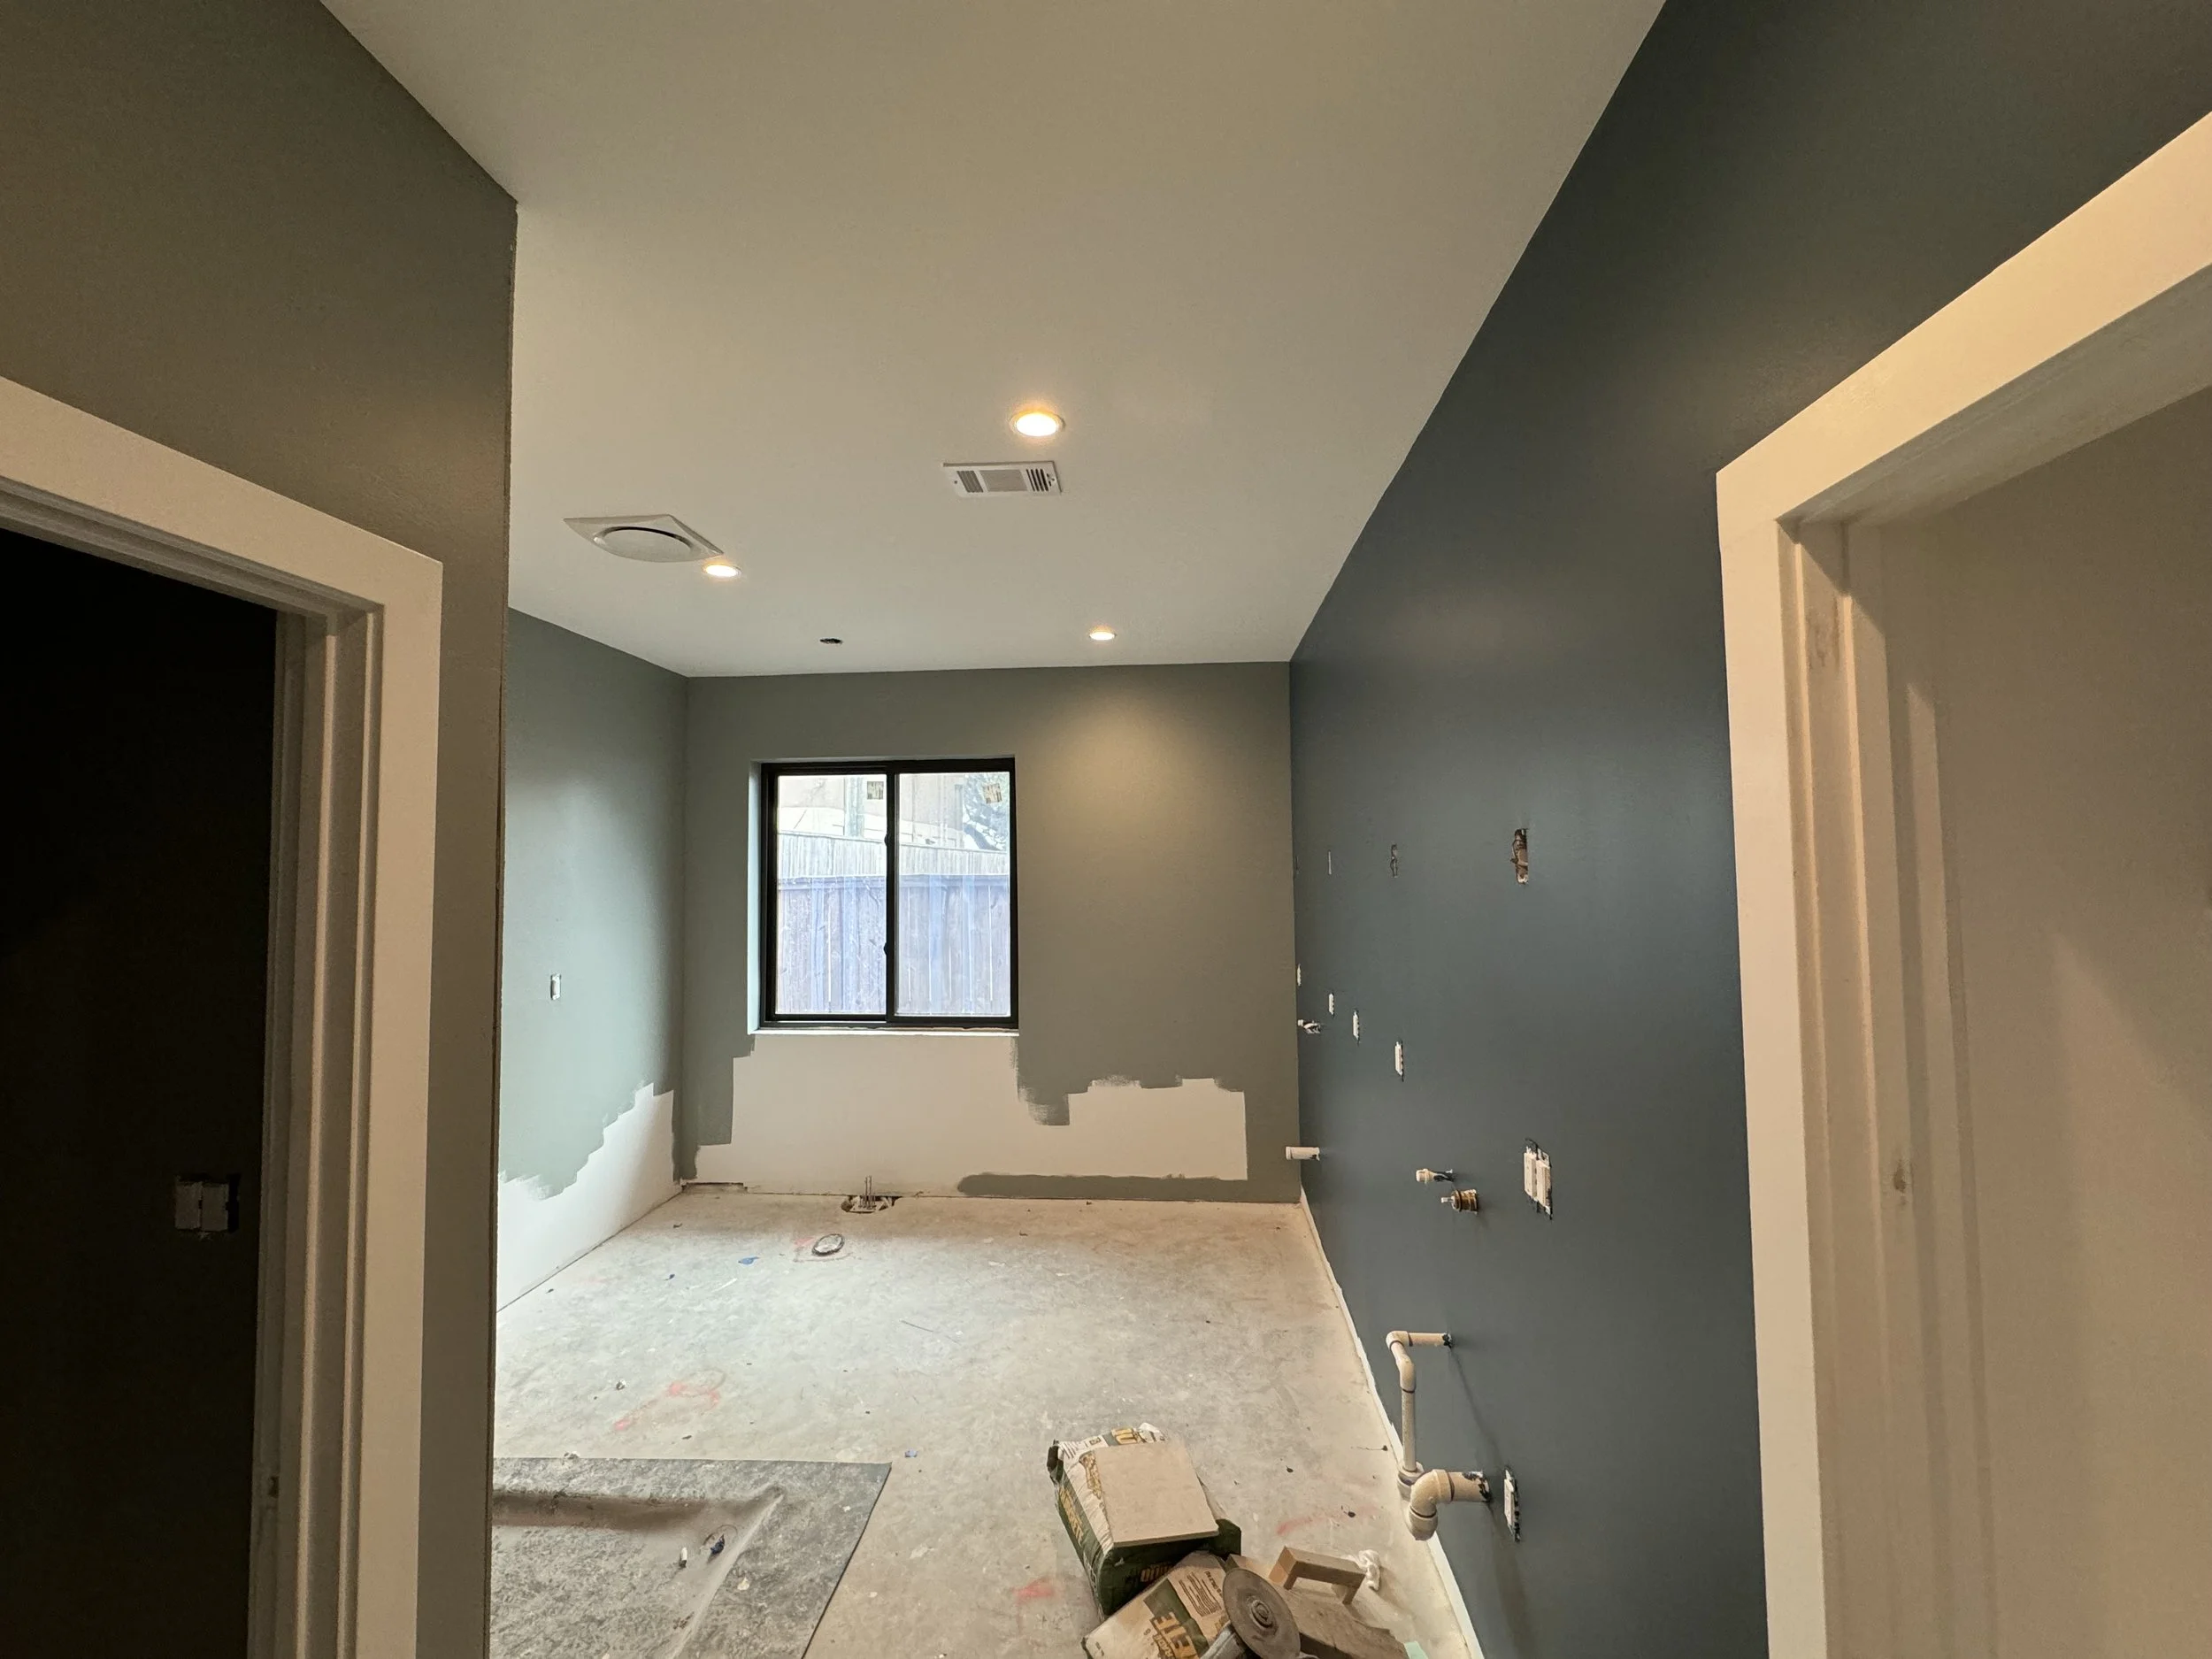
Primary Bath - the unpainted lower portion of walls will be tile. Vanities are on right wall with the dark blue color.

Primary Bedroom - basically same colors as primary bathroom.

Hurricane Beryl

On the plus side, the house came through Beryl with no problems at all. Shockingly, the fence that is barely standing after the Derecho storm in May didn’t fall over again. I think we lucked out on wind directions there. We definitely had some minor tree limbs down, but the house didn’t seem to loose power or internet at all. Travis’ house was without power for 5 1/2 days, but luckily we had housing options and didn’t have to stay there in the heat and humidity.

We got the debris cleaned up pretty quickly and luckily we seemed very early for city debris pickup so all our stuff was gone within days.

Gas Service

We put in a request to get gas service turned back on in late May. They told us it would take about 4 weeks. On day 27, Doug spent several hours talking to four different people at Center Point trying to figure out what was happening. On day 28, a bunch of people showed up and we ended up with a riser coming up next to the house that is connected to the gas mains. They told us we needed to call the meter department to request the meter. We’ve tried to do that and have been told they are still waiting for permit office to confirm an inspection has heppened. It has (months ago), but they don’t seem to see it. Builder and plumber are working to get that sorted so perhaps we’ll make some progress. The fear is that it’s a 4 week service level for the gas meter also.

Pretty exciting picture of our gas riser!

Front of House Updates

While the crews have been working inside, we’ve been doing some cosmetic updates in the front of the house. You may recall that the house originally had a brass mail slot next to the front door. It was a really poor design for a mail slot (vertical with a sharp bend behind it to force the mail into the storage box). We didn’t have any desire to use the mail slot going forward but we did like the design so planned to clean it up and leave it in place. During demo, the guys threw the thing in the dumpster but we were able to find it with a bit of dumpster diving. In June we started cleaning it up. This ended up being a bit tougher than we expected. It was very dark, which we thought was just tarnish. Turns out at some point it had been spray painted. Between the two of us, we were able to clean it up pretty nicely and have gotten it re-installed. Doug ended up using his laser engraver to create a sign inside the slot for anyone who might try to use it.

We also installed a new mailbox that will be used going forward. The new mailbox matches the color that we’ve selected for the front door.

Finally, we spent quite a bit of time trying to select house numbers for the house (the old ones weren’t that visible - especially at night. We finally found some on Etsy that we liked a lot and installed those. We’re thinking we may end up painting the white numbers the same color as the door/mailbox.

We ended up having a few places where we had to patch holes in brick mortar as a result of removing old door bell, house numbers, etc. We put our masonry hats on feel like we did a pretty good job of patching holes in a way that doesn’t make them jump out at you as you walk up on the porch.

The old mailbox slot and the new mailbox. If you look hard, you can see our mortar patch job two rows below porch light.

“Don’t try to put mail here!!”

New house numbers - still white.

Attic Lift

We decided to install an attic lift in the garage to make getting things up in the attic a bit easier. it’s a small platform that you can put up to 400lbs on and then it gets pulled up into the attic. We finally ordered this last month and decided to install it last week when we had an unusually mild week weather wise (highs in the mid-eighties rather than mid/high nineties.

The lift came with installation instructions, but that were bad. They look like Ikea instructions, but are much, much worse. In many places they’re missing important info. Luckily, the owner of the company also did a video on YouTube. It’s also not great, but between all of it, we felt we could tackle it. The company suggests it should take 3 hours for a professional. It took us at least 9 hrs over three days. We ended up having to call the company as we couldn’t get one of the two motors to work correctly. Turns out, customer service is the owner and he immediately spotted our issue (we were on a FaceTime call). Turns out we put one of the motors in upside down (one of those missing details).

We still have some trim work that the builders will do and then we’ll build a cover for th platform that will clean up the look on the ceiling.

August Activities

We’re expecting tile work to start in the bathrooms and utility room next week. Doug & Travis will be installing the floor heater system in the primary bath after the tiler (Carlos) installs a subfloor that looks very much like a giant Lego board.

We’re also expecting the oak floors to be ordered Monday or Tuesday. Apparently they will take 4-5 days to arrive and will have to acclimate in the house for a week or so before install. We expect the installers to sand them down and then cover them (they’ll be stained towards the end). We’re still working with builder on when we can install the closet systems we have ordered and waiting to ship (we don’t want to make floor work harder).

The cabinet maker has been busy building cabinets over the last month or so. Not sure if those will go in during August or not.

We expect that we’ll install wallpaper in the powder room in the coming weeks.

We’re also hoping to get epoxy floors installed in the garage and workshop.

End of June Update

June Update

A lot has been happening over the last month!

Electrical

Once we got our electric meter installed and permanent service running, electrician 3 (E3) got on the job and pretty quickly had everything in place for ACs. Once they’d done that, they moved on to installing outlets and switches throughout the house. We’d like to say that went smoothly, but…

Having a different electrician do final wiring from the rough-in work isn’t ideal. By the time E3 started, drywall was in place so he never really got to see what was behind the walls. This means they they often spent time second guessing what had happened before. On top of that, we have quite a few “smart” switches in the house. In some cases those are in settings where we have multiple switches controlling the same lights. E3 was very confident that he knew how to wire these, but clearly that wasn’t the case (and apparently isn’t willing to read the very clear instructions that can with them). This first came to light when they were trying to do the first pair of these. They were convinced there were wiring issues involved. They spent hours trying to track down the problem. Finally they gave up for the day and since we were there waiting for the AC guys to leave, Travis decided to take a look. We undid all the wiring for those two switches and redid using the instructions. They worked perfectly. The next day was Saturday so we ended up fixing several more of the smart switches that weren’t working. When we left for the day, we had these signs in places for their arrival on Monday morning.

One of the signs Travis put up after we wired the living/dining/kitchen lights for E3

On the plus side, there was only one major issue from the work E2 did. We had one location where there was no “hot” wire leading to a light switch. After a bunch of trouble shooting, they ultimately figured out the issue and had to cut out a small portion of drywall and foam insulation to run another line. Other than that, there were a few places where E3 and helper had to tighten wiring nuts, but nothing major.

Site of our missing “hot” wire.

Air Conditioning

The AC guys started installing the two central units and one mini-split unit (in the Workshop) as soon as they had working electricity. They got the main units installed pretty quickly. (which was the priority) and the mini-split about a week later. We still need to get them out as we feel the larger unit has a vibration or something that’s making a bit of a high-pitched noise that’s pretty noticeable in the guest bath/bedroom. We also think they may need to adjust some dampers to increase flow in the guest bedroom. We’ll be putting some temperature trackers throughout the house to see how things are in each room. Mostly it’s just nice to walk into a cool house!

Oh - and we think we may have the sturdiest concrete pads for ACs we’ve ever seen. The builder installed them - they definitely aren’t going anywhere!

Our ACs with over-engineered pads

The workshop mini-split

One of our hanging temperature sensors. We will have data!

Exterior Paint

The guys finished the rest of the exterior paint over the last couple of weeks (except for the front door). All of it looks great. The only major exterior thing in builder scope that needs to happen now is to finish the ceiling of the large patio. It’s going to be stained pine and should happen in the next couple of weeks.

Outdoor Lighting

Most of the exterior lights were installed in the last two weeks. We have sconces in the back yard and then we have a new front porch light and eave lighting on all four sides of the house. E3 and team installed the sconces but we ended up adjusting 3 of those to get them a bit straighter. Travis installed the front porch light (think he wanted something to do while waiting for E3). We both installed the 19 eave lights, as we’d pre-configured them (they are smart lights) and knew they had to go in specific locations. If you recall, way back in time we discussed going over to the house at night to measure where the eave lights should be for best illumination of walls. We feel that really paid off. The lights look great. These will generally be a warm white color but they are color lights and each light can be any color so we may do things like red/white/blue for 4th of July. Here’s a picture of the front of the house with the lights set to a warm white.

Eave lights and Front Porch light (taken before we added the last light between garage door and window)

Close-up of the front porch light.

Back-yard sconces and patio lights. Luckily not so bright that you can see how bad the yard looks.

Masonry

The masons had finished their work but then we had the “Derecho” storm last month. We’d showed a picture of our fence falling over. What we didn’t realize at the time was when that happened, it ended up putting a crack down our patio post that it hit. As a result the brick guys were out last week fixing the bricks on one side of that post. All brick work is now done and hopefully the excess bricks will go away in the coming week.

Interior Doors

The interior doors were installed a week or so ago. This includes regular doors for the room entrances, by-pass closet doors in three bedrooms and pocket doors leading into the office and guest suite. We’re happy with our selection.

Both sets of pocket doors seem to be warped for some reason and the distributor is coming out Monday to take a look. Presume they’ll end up being replaced.

This is one of the sets of closet doors. We have the same style door throughout the house, but this is the only picture we took. These obviously haven’t been painted.

Interior Cabinets

We met with the carpenter a month or so ago and he’s been off building cabinets for the kitchen, living room entertainment center, dining room, and utility room. All of the cabinets in the main room are walnut while utility room will be “raw” stain quality plywood. He’s apparently making great progress and has a bunch of it in storage. Hopefully by the time the floors are done, he’ll be ready to install everything.

Hot Water Heater

The plumber was out this month to install the tankless hot water heater to try to wrap up activity in the attic. With that done, he’s now just got one more gas line to run (from back half of house to front half of house) and then all the finish plumbing (faucet/shower trim, toilets, tubs, etc.). Those will happen towards the end of things.

Insulation

Once everything was theoretically finished in the attic, the builder had the insulation guys come out and finish insulation work (they had previously done spray foam in the exterior walls and insulation batts on interior walls (for sound) and in ceilings where there was no attic access. The last step was doing blow-in insulation for the rest of the attic. That was done this last week so we are now fully insulated finally.

Interior Millwork

This last week, the guys have been installing baseboards and door trim. They are currently doing prep work on all that (filling nail holes, seams, etc.) and should be ready to start interior paint by middle of next week. At that point we’ll know if we did a really bad job selecting colors. 😀

Gas Service

We’ve put in a request for a gas meter. It’s been sent to the same sub-contractor that they used to remove the original meter. We’ve been told 4 weeks, but that’s what they said last time and that ended up being six weeks and perhaps only happened when builder had one of their other clients intercede (he works in gas operations for CenterPoint). We’ll see what happens.

Garage Doors

Our replacement garage door panel arrived and was installed. Unfortunately, the workers had gotten the door catty-wampus at some point and we had to have the installers come out a number of times to get things aligned correctly.

We also ended up using wall mounted garage door openers which we’re really pleased with. They are quite, since they don’t have belts/or cables. We’d not known about them before looking at openers this time, although they’ve been around for years.

Wall mounted garage door opener, which turns the door shaft directly rather than using a belt or chain to lift the door.

Tools

It’s possible that Travis wanted to remodel a house so that he had a good reason to buy lots of new tools. This month we’ve utilized the following new items

  • Gyroscopic Screwdriver - this thing is amazing! Basically you just twist your hand slightly in the direction you want the screwdriver to turn and it does it! The more you slightly move a direction, the faster it turns. You can adjust the torque and it can also be converted to a pistol grip. We both love it!

Best Tool ever!

  • Electronic Angle Finder - On the sloped ceilings, we have adjustable can lights that allow you to turn the light lens so it’s parallel to the floor. We used this small tool to check angles to make sure they were as level as possible

Doug using the angle finder on a light

  • Thermal Camara - this is an add-on for a phone that allows you to do thermal images of whatever you point it at. We used it to test how well our insulation was working and whether they’d missed any spots.

  • Circuit Tracer - Travis used this with E3 to identify specific wires. It ended up saving a lot of time. Travis may end up helping the builder with one of their other projects on Monday as they have one circuit in a concrete wall they can’t find (they took over this project when the couple became unhappy with the first builder).

Memorial Day Update

It’s been a bit crazy since our last update. We’ve got progress in a number of places but we’ve stalled on electricity and as a result of a huge storm we had here in Houston, it’s not clear when electrical will progress

Electrical

As we mentioned last update, we were expecting an inspection the next Monday. Electrician 2 felt a couple of things needed to be fixed before that happened so Electrician 3 made those changes. Ultimately, the inspection happened late that week and passed with no problem.

Travis had already put in a request for electrical service several weeks before this so we expected the meter to be installed and power to be connected pretty quickly. Early last week, we saw on our security camera that two guys had gone back to where the service panels were and then came back out. They didn’t look like they would have been there to install (they weren’t really carrying anything significant). We figured they were the “team before the install team”. Turns out that was the case and they red flagged us indicating that we needed 400 Amp service rather than 200 Amp service. Travis had spent a lot of time on the electrical plan and knew for a fact we only needed 200 Amp service, but we weren’t really sure how to escalate this.

Travis called CenterPoint and after quite some time was given the name & number of our service representative who could help sort it out. He tried called her several times but the phone only rang and rang for minutes before coming back with a message that the number was not set up for voicemails. In the mean-time he talked to Electrician 3 and he gave some clues for who to ask for. Travis calls back and ultimatlely asks for the regional service manager. The guy comes on the phone and they discuss our inability to connect with our service manager. Turns out that person doesn’t work there anymore and he’s shocked we were given her name/number to call. This guy ultimately talks through our problem with Travis and asked him to send the load analysis showing that a 200 Amp service will suffice. This is 2 weeks ago on Tuesday. Travis sends it off and by Thursday morning, the guy comes back and indicates that CenterPoint agrees we are good with 200 Amp service, but for some reason, their contractor that actually does the work still isn’t comfortable installing 200 Amp service rather than 400 Amp service. He indicates he’s escalating to see if he can just get CenterPoint technicians to do the work. On the same day we’ve been told that it’s been 30 days since we requested service and because it hasn’t happened, ERCOT (the group that manages the Texas Electrical grid) has cancelled our request and we’ll have to re-request. Travis puts in a request for electrical service again and that afternoon CenterPoint guy comes back and says they will do it themselves as soon as they see the request come through (usually takes 1-2. business days to filter throught).

Two hours later, we have a massive storm in Houston that knocks out power for about 1 million homes and does tremendous damage in our part of town as well as many other parts of the city. We lost power at both Travis’s house and the new house, but luckily we had no major damage (in comparison, the house next door to Travis’s as well at least 3 others on the street had big trees fall on their roofs). Needless to say, we are not going to be a priority for the new service so we’re in a bit of limbo on when we can expect that. It’s been 9 days now and all but about 1200 houses have had power restored, but there will still be a lot of work for them to make some of that work more permanent. We’re hoping we’ll get it soon, but who knows.

Garage Door

The replacement panel for our garage door arrived and was installed yesterday

Notice how the windows all line up!

Bricks

As of this week, the masons have just about finished everything. Since our last updated, they’ve finished all the columns (front porch and back porches), bricked round the replacement patio door, and done most of the patch work they need to do. We believe there are two minor repairs they need to make and finish cleaning up everything. We’re both quite happy with how it’s turned out.

We forgot to take a picture - here is one from the security camera.

Doors

All of the external doors have now been installed (but not painted). We’re really happy with them. In the picture above you can see the replacement patio door that is finally correct (after 4 attempts by Home Depot). It looks great! You can also see one of the exterior doors (on the patio - it leads into the utility room).

Our new front door. It will ultimately be a darkish orange color.

The interior doors will start getting installed next Wednesday

Interior doors waiting to be installed.

Floors

Over the past couple of weeks the guys have been working to prepare for the hardwood floors. The hardwoods will still be quite a while, but they’ve been preparing subfloors. This is a multi-step process. First they used some self leveler to fill in any low spots in the concrete slab (all on the original slab). Once that set, they heat up tar and brush that all over the slab and then stick 2x4s in the tar at very regular spacing (boards used in this fashion are called screeds). The tar dries overnight, but that portion probably took 4-5 days overall. Once they finished with the tar/screeds, they started putting down plywood subfloors. In our case, they’re put 1 1/8” tongue & groove plywood. They wrapped that up yesterday and it all looks great. it’s nice to have a level surface throughout the majority of the house now.

The big room with half the tar/screeds installed.

View through front door with subfloors in place.

Living room with subfloors and new patio door

Paint

After a bit of work, we think we’ve made all of paint selections. We probably need to do a bit of review at different times of day to make sure they work with varying amounts of light, but all in all, looks like we’re in a good place.

Travis checking cabinet color against some paint options.

Upcoming Work

As we indicated above, the internal doors will be installed starting this week. We expect the mason’s to finish the last two small items. At this point, we’re really needing electrical so that we can get air conditioning working in the house. There are only a few things they can still do before we have conditioned space. They won’t do trim, cabinets, final paint or hardwoods until the are working. Hopefully we’ll get power this coming week!

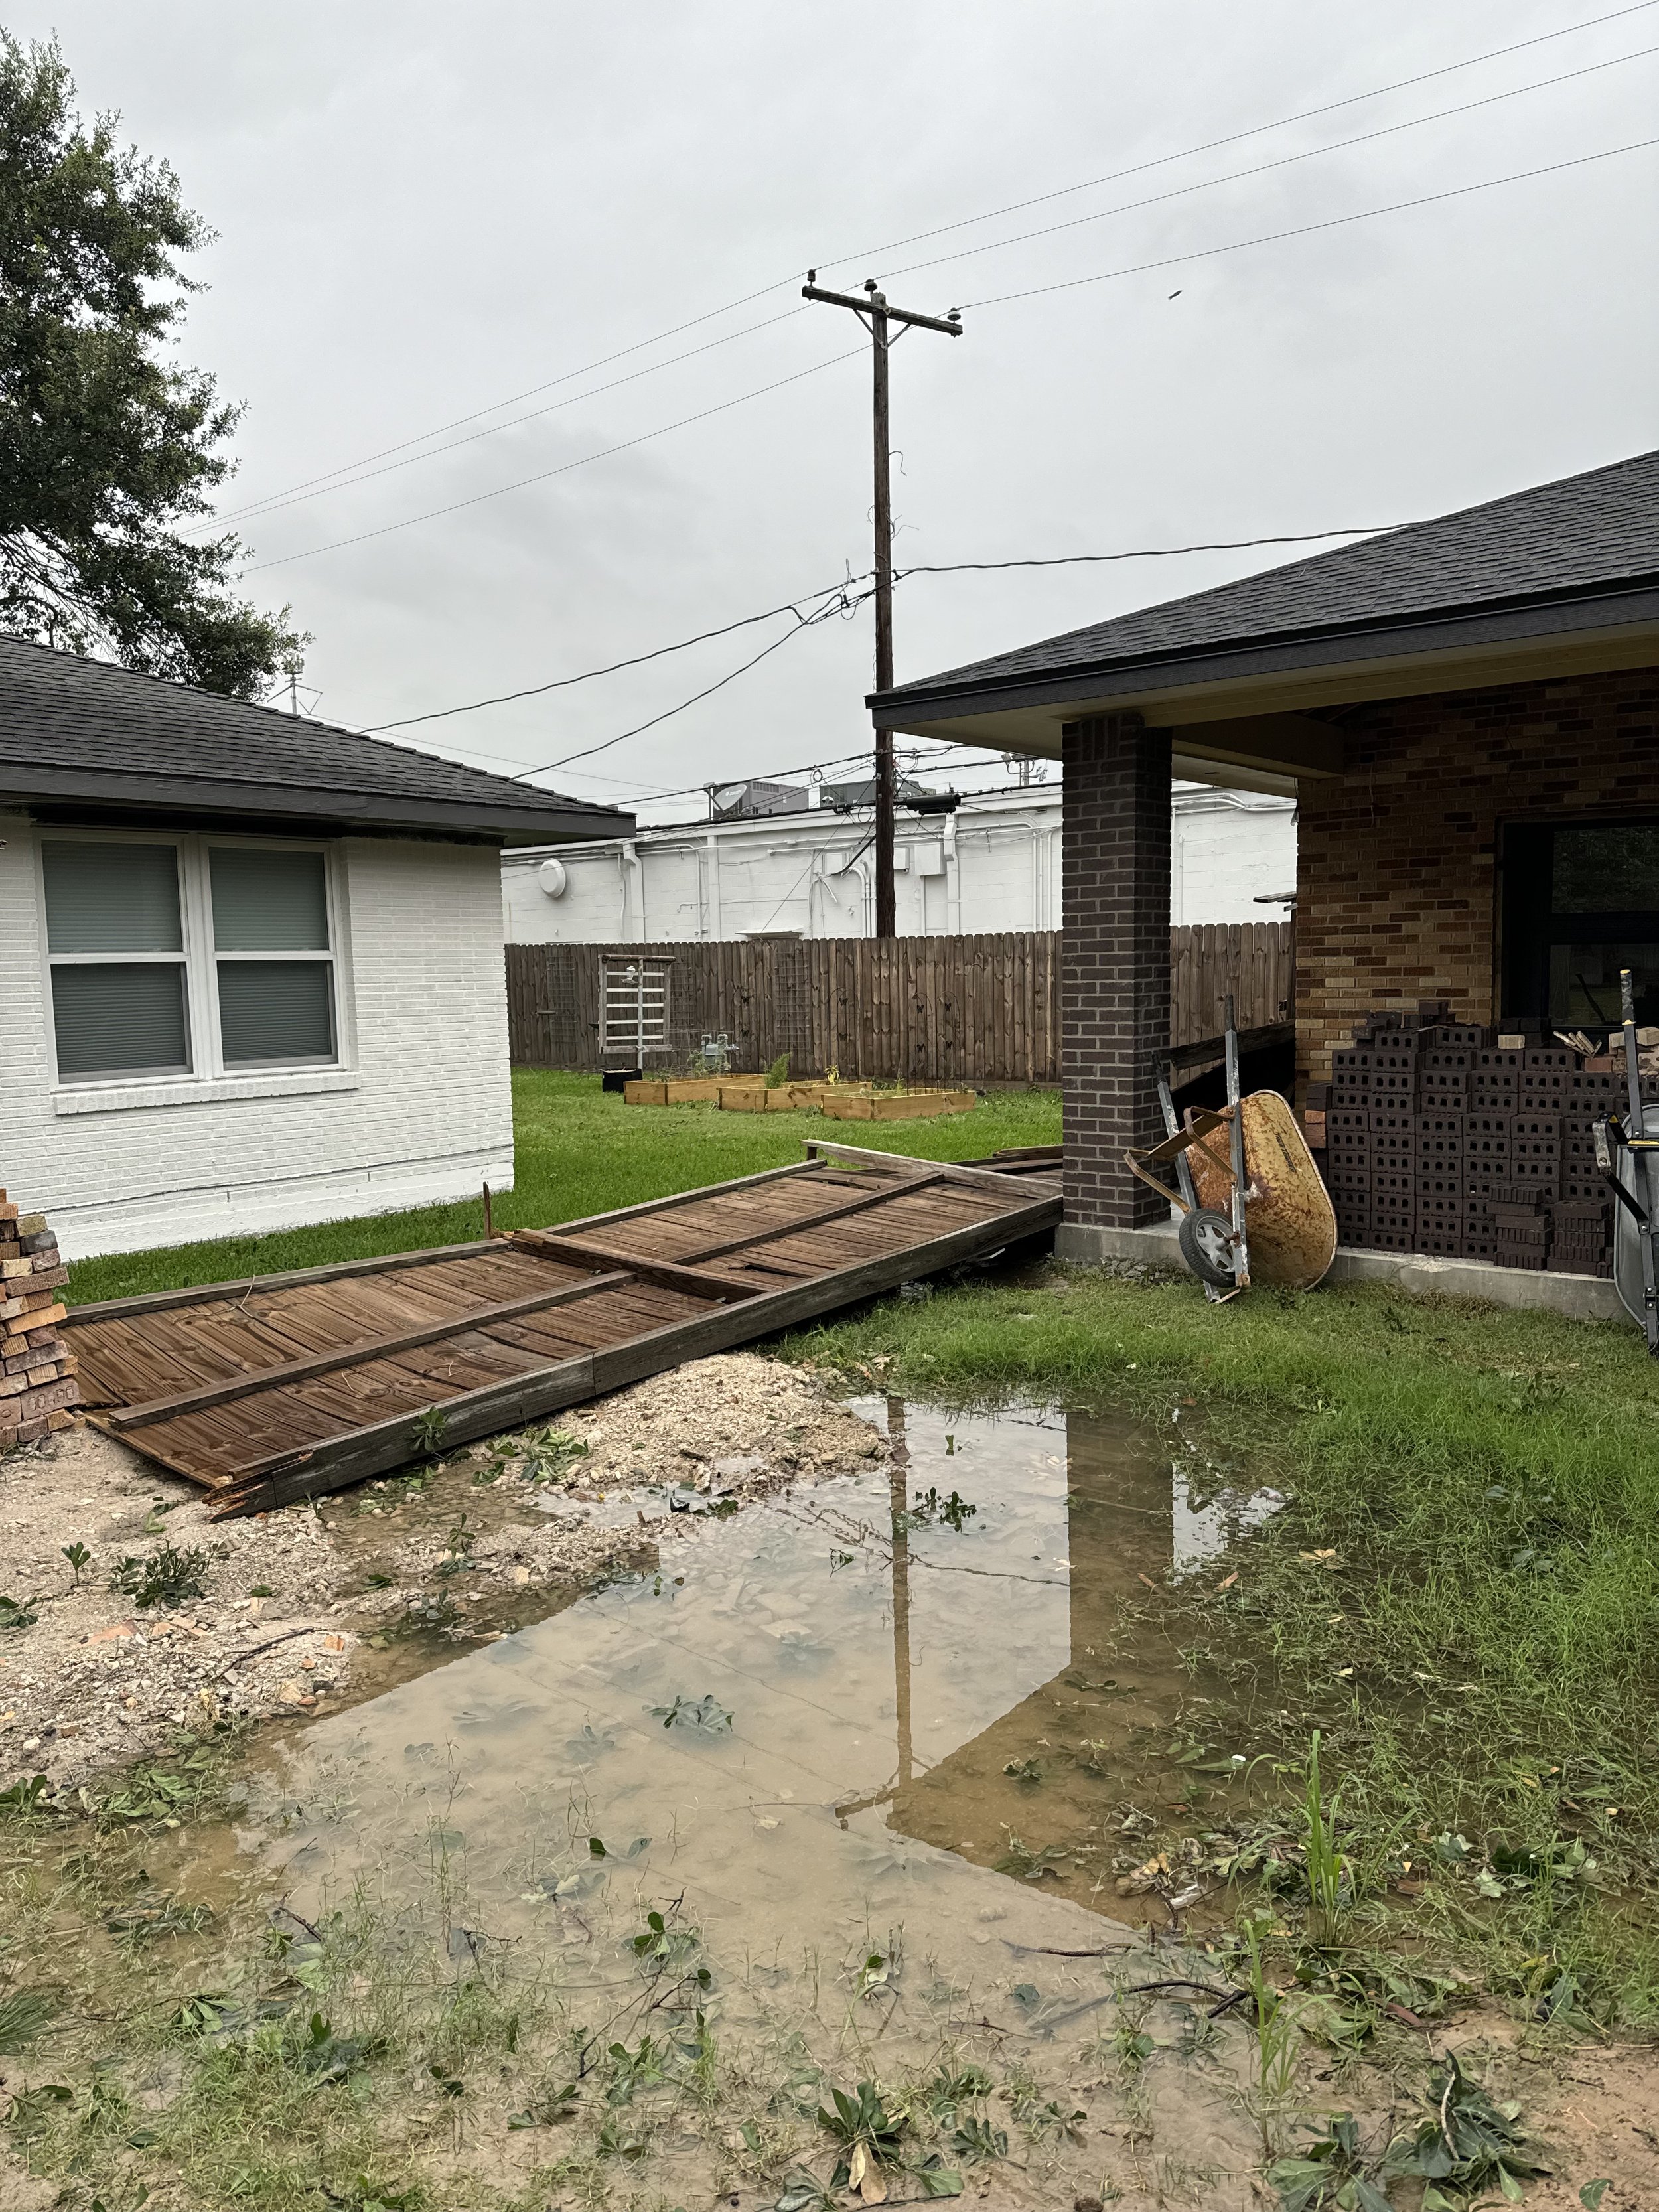
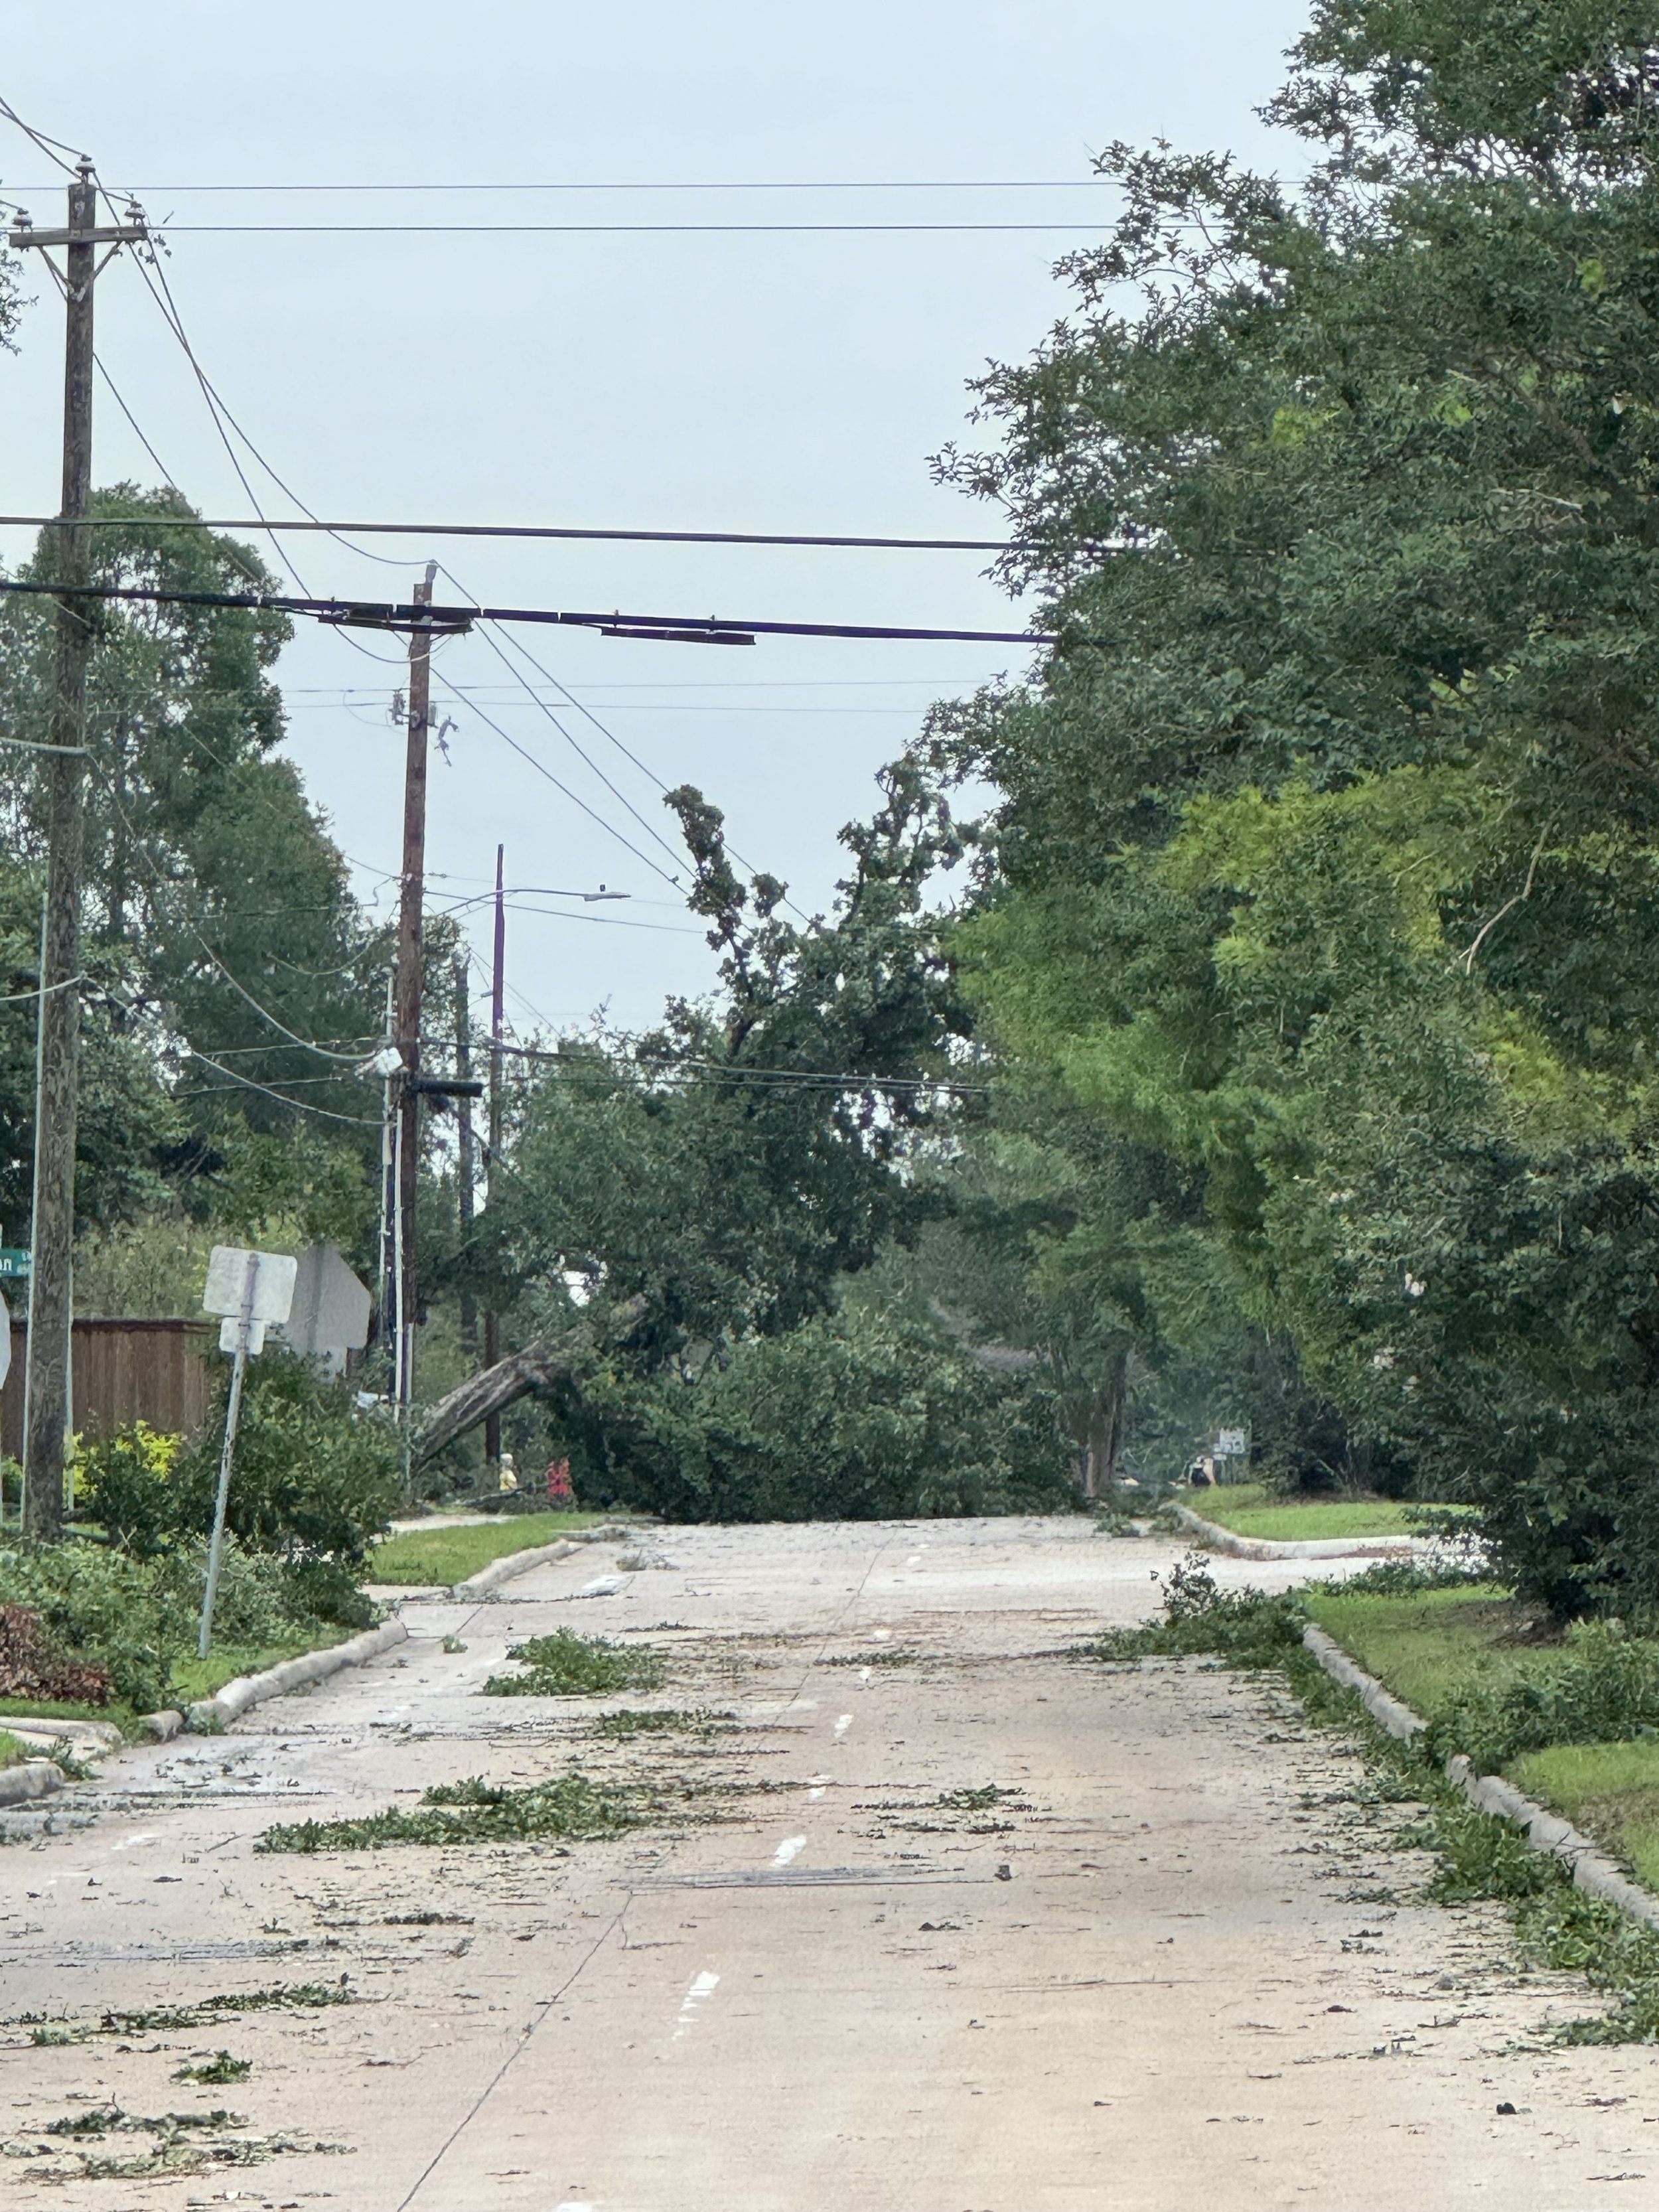
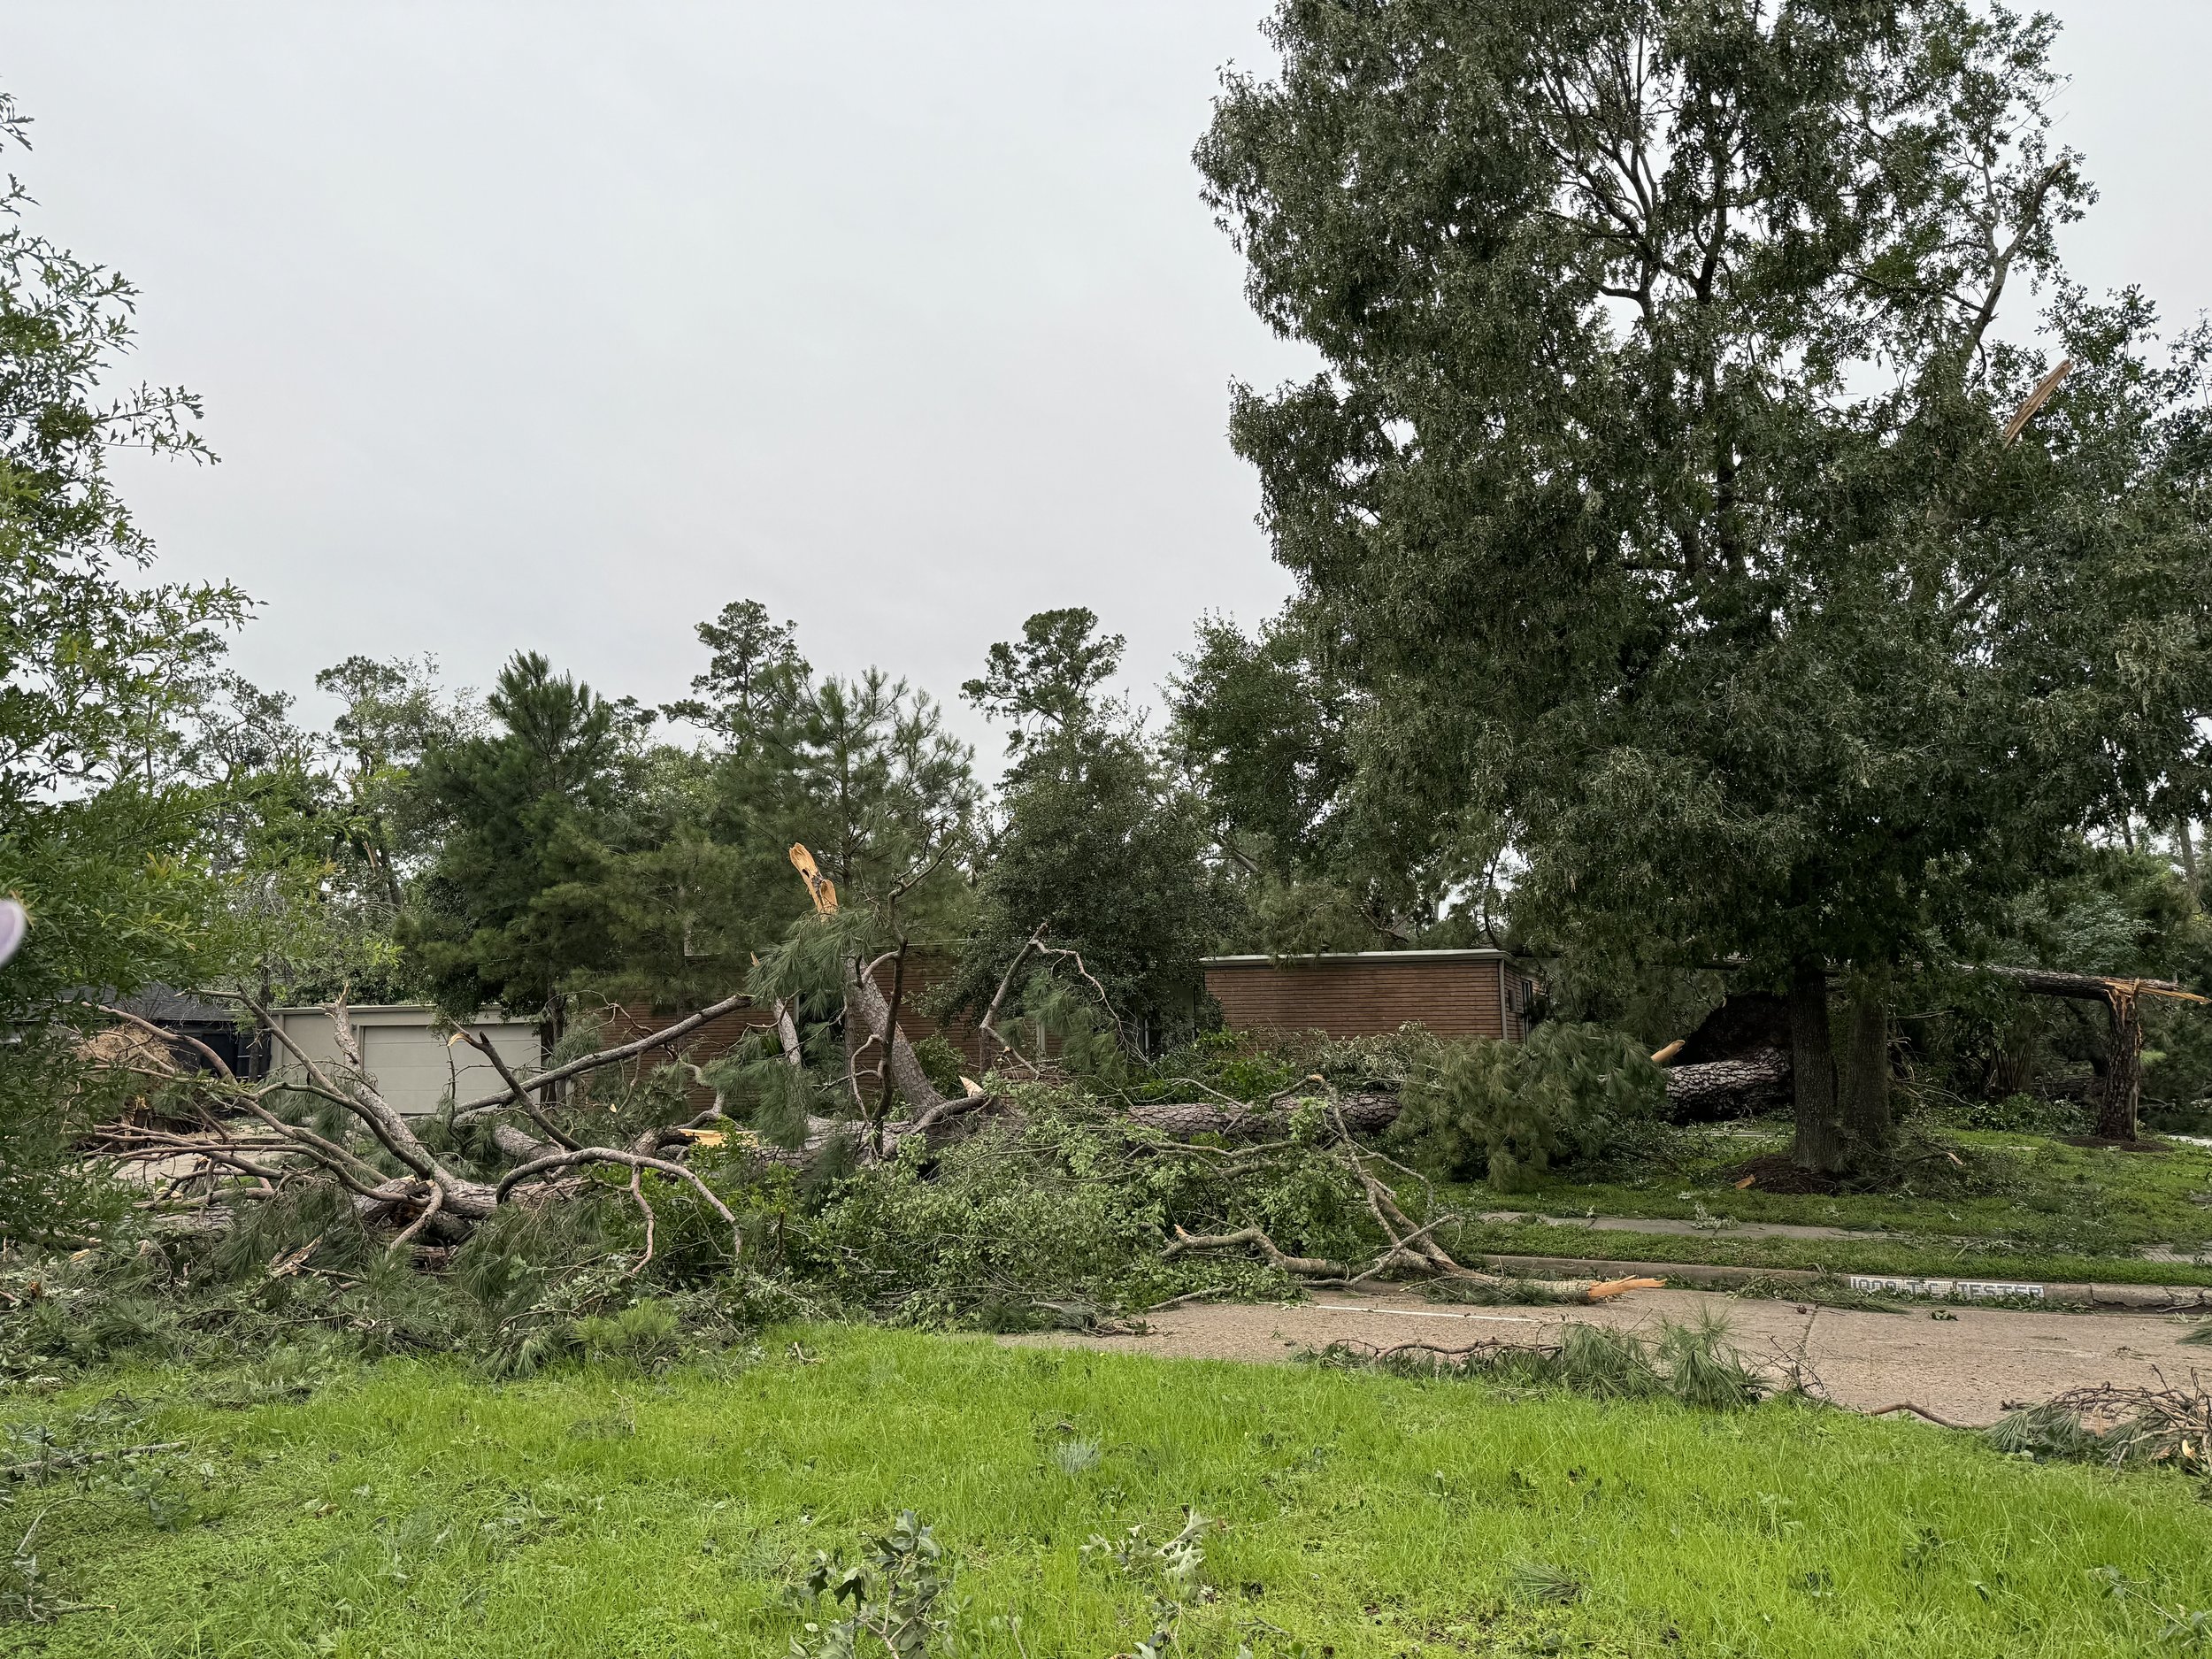
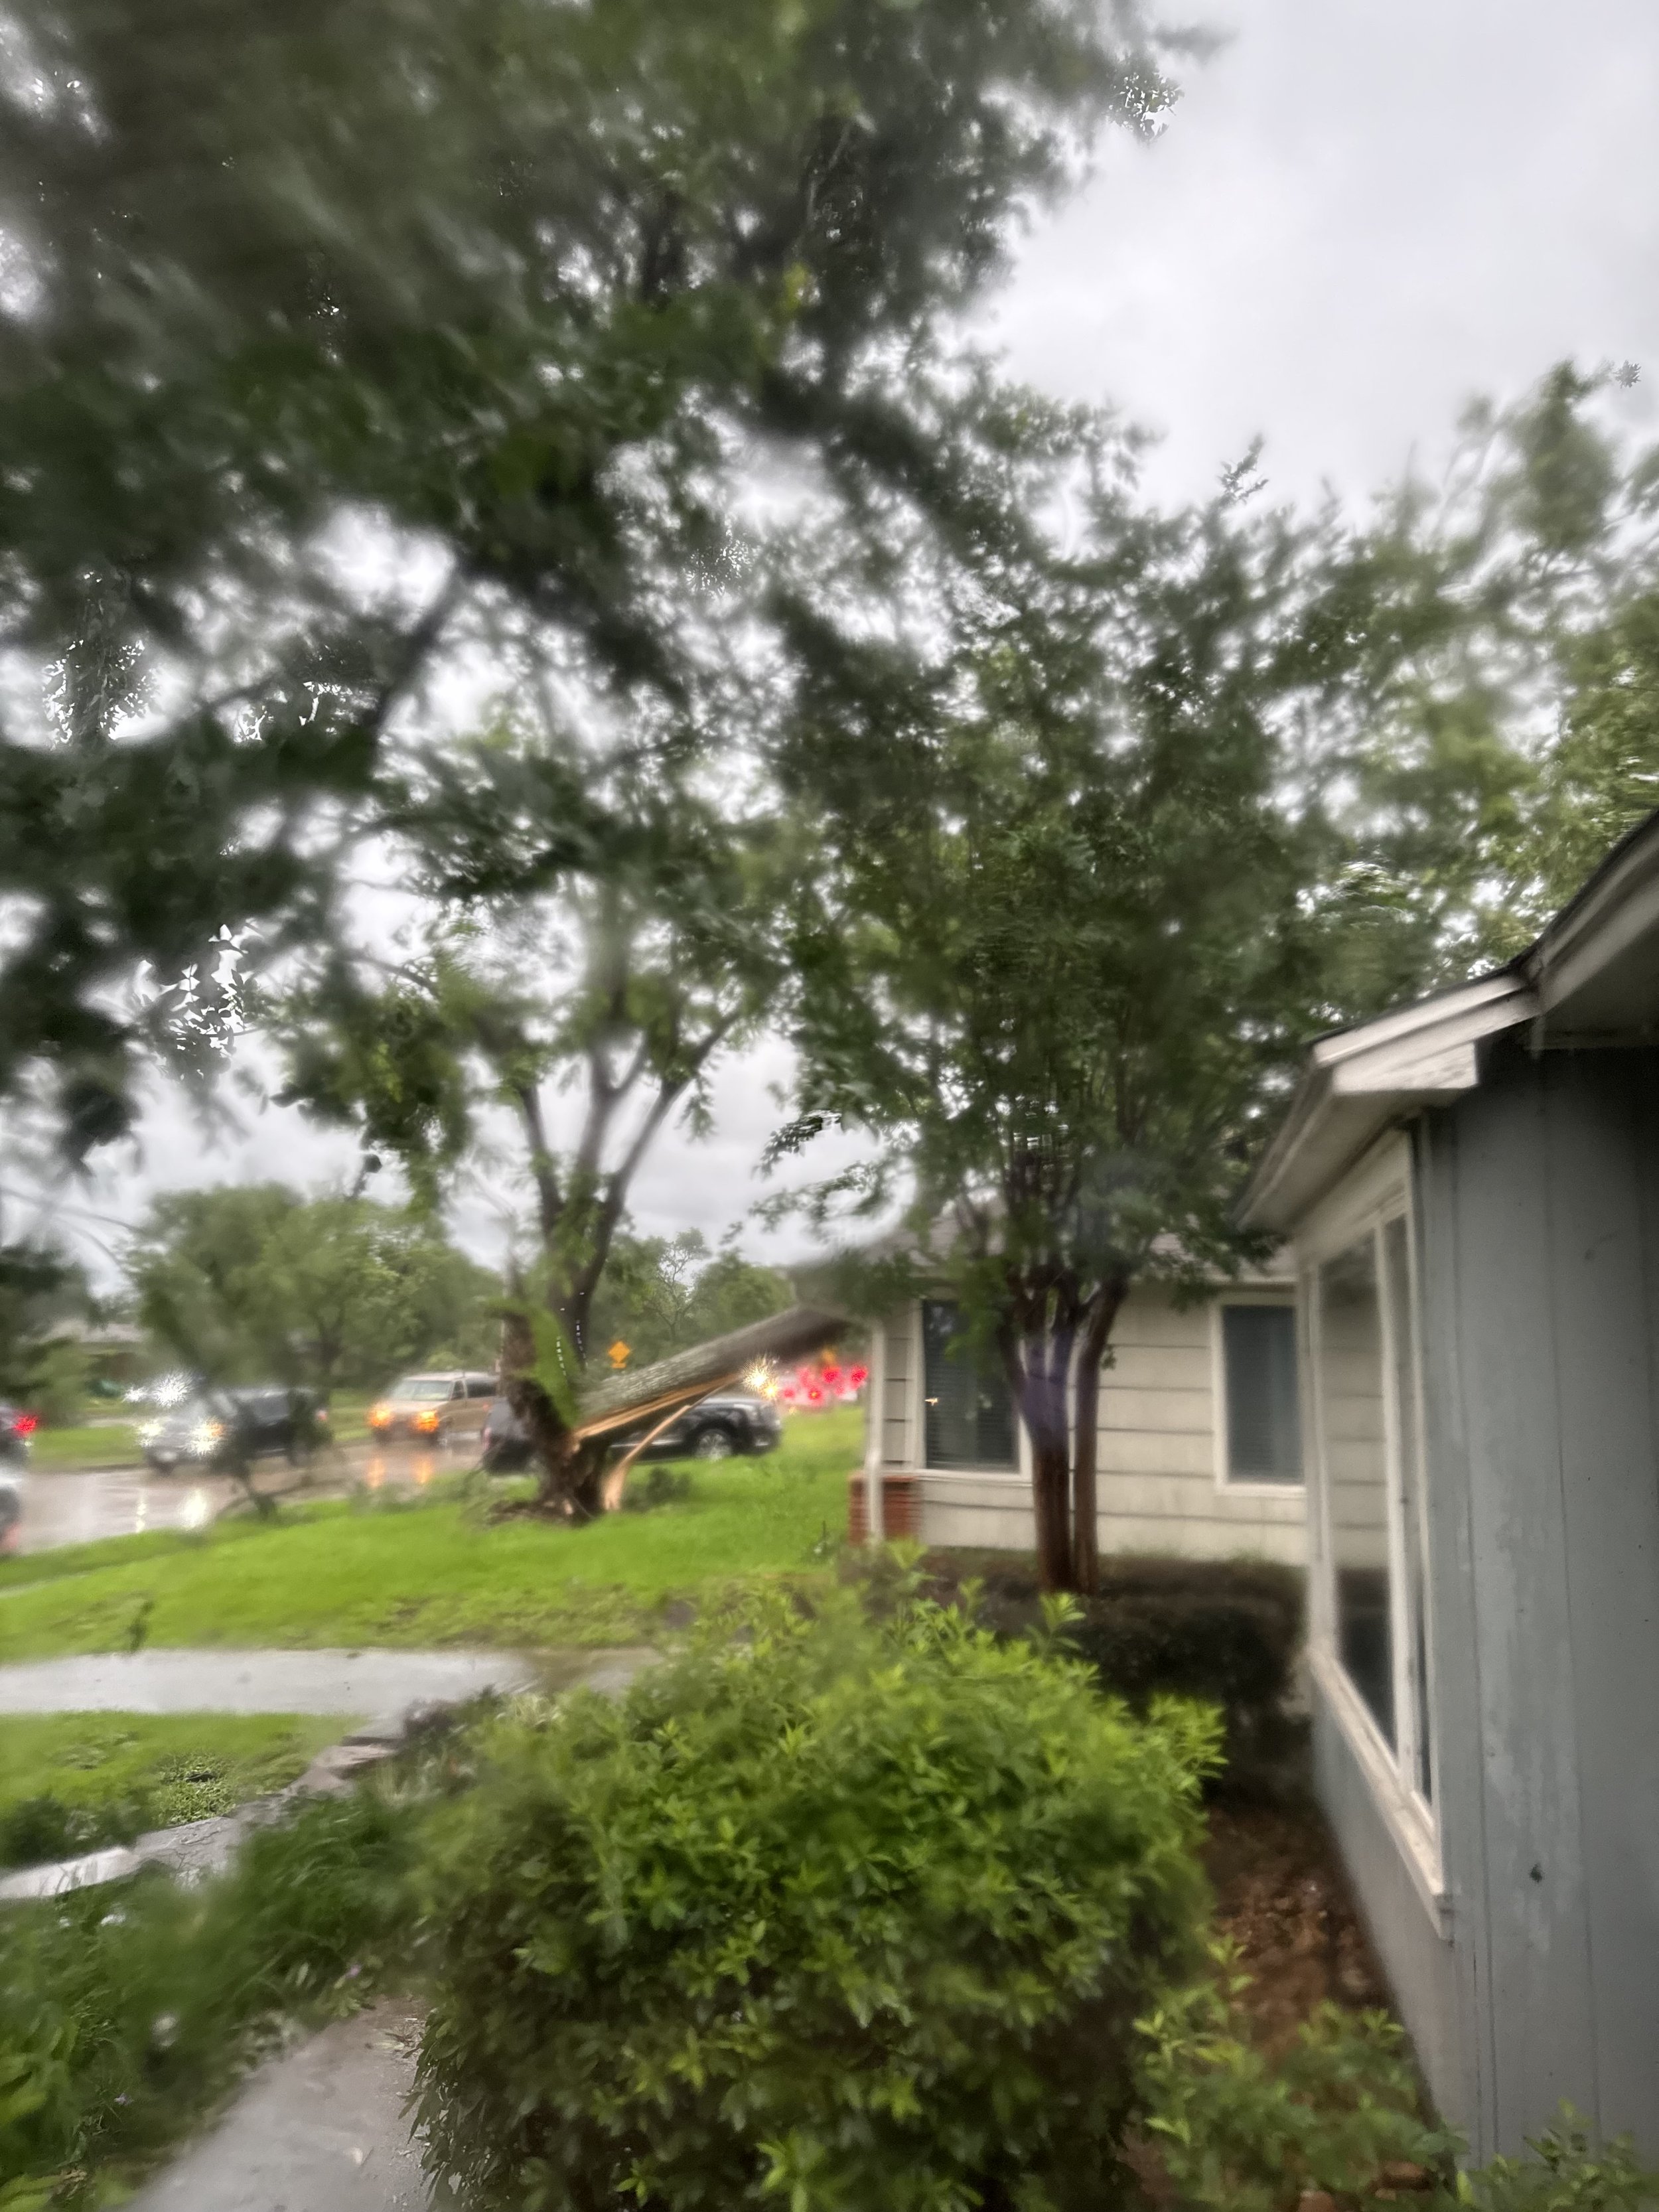
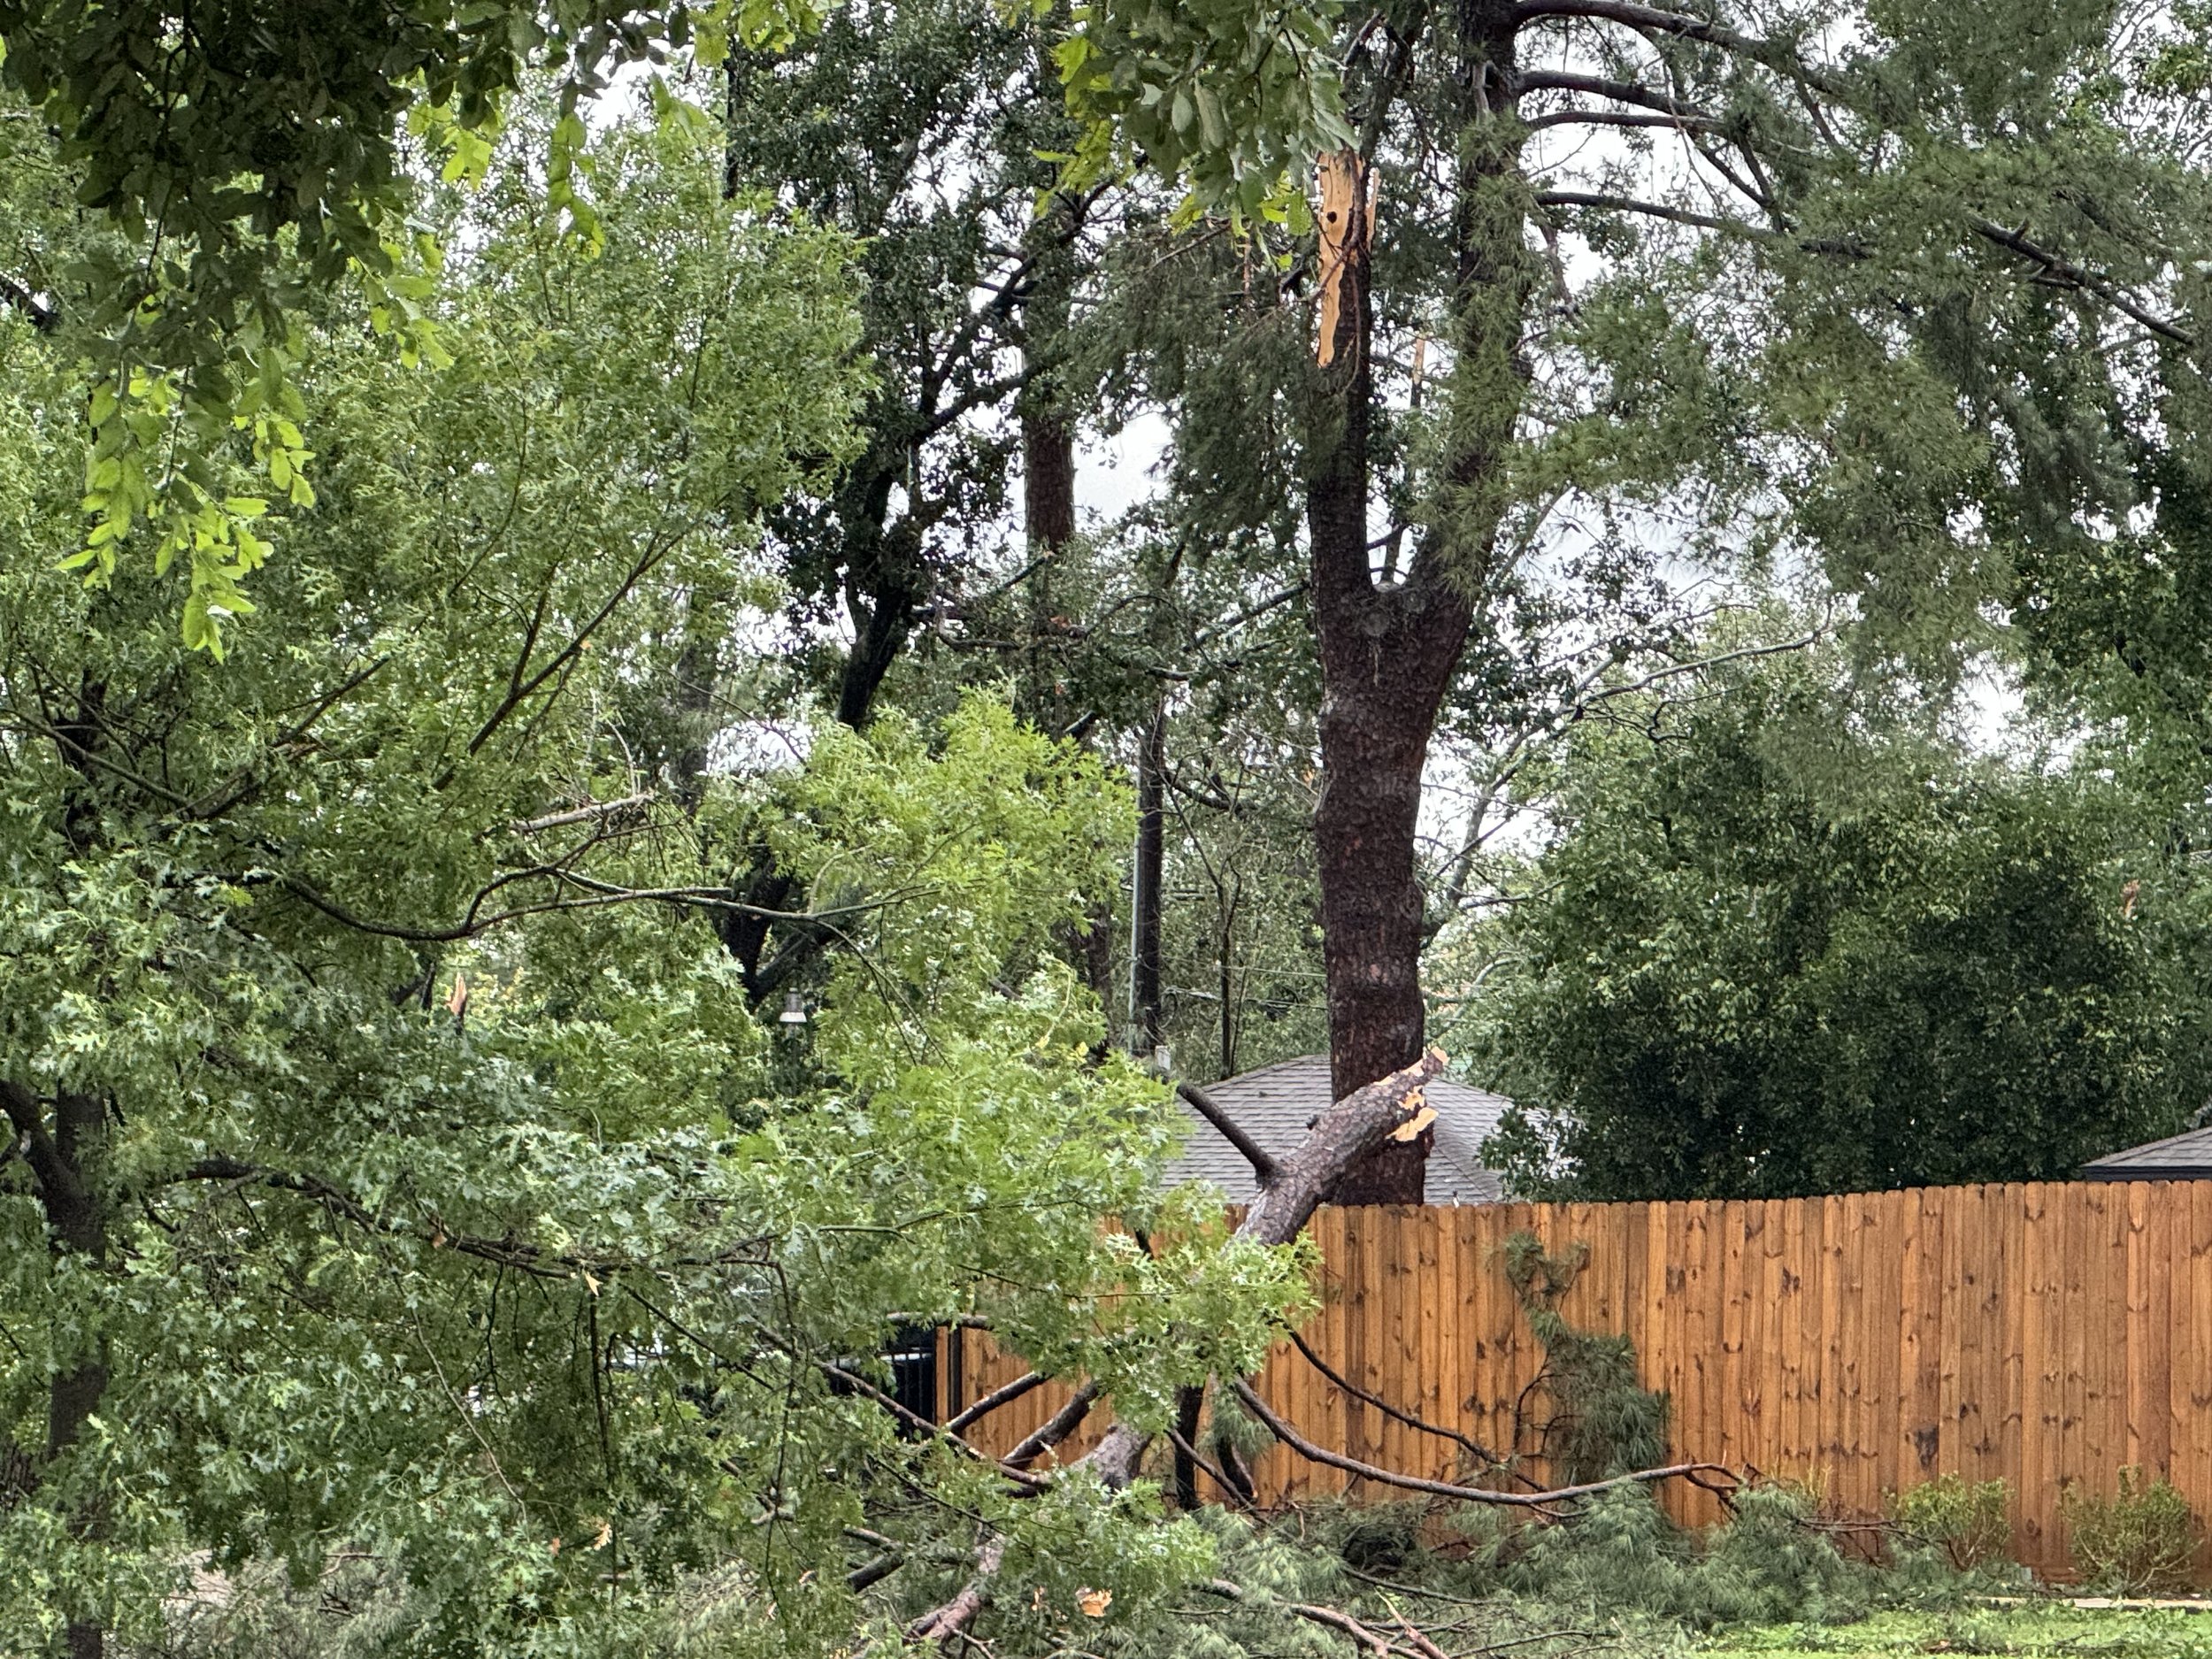
Some photos from the storm

The first photo below is our downed fence at the new house. The guys have temporarily got it standing with braces but we’ll need to put in a new one once we’re done. it was in bad shape anyway, so not a huge loss.

Lots Happening These Days

Quite a bit has happened since the last post.

Drywall

Once the wall and ceiling insulation finished (still some blown in insulation in the attic to be done once all electrical work has bee completed), the drywall guys started. They got that up pretty quickly and then set to work at taping/floating. The drywall work went on for 3 or more weeks as the taping/floating/sanding took quite some time. We both feel pretty confident we would kill ourselves using the stilts they did to do high spots.

Lighting Locatation Prep

In the middle of that work, we realized that the subfloor was going to start immediately after they finished and texture had been done and all of our light location marks were on the slab floor. We decided we needed to accurately mark the locations on the ceiling drywall so the electrician would know exactly where to cut the holes for the “can” lights (they look like cans but are only an inch or so deep). To help do this, Doug created a couple of “tools” on his laser cutter/engraver that we could use to transfer locations to ceiling. Basically we use a laser we’d been using to identify location on the floor mark. It shines a cross mark up on the ceiling in the center of the light. The “tools” get centered on the laser mark on the ceiling and then we can draw a circle around the center mark. It worked really well and allowed us to transfer all the locations in just a couple of hours.

Doug Using the tool he created (Travis had the great idea of adding the handle to it). If you look closely ou can see the green laser marks shining from the floor and crossing in the crossbars of the device.

Bricks

About the same time the drywall started, the masons have started bricking exterior walls. As we’d mentioned, the owner was able to find old used bricks that match our original bricks. Some of them are lighter colors but he assures us he’ll be able to stain those and it will look great. He doesn’t have enough to do the back wall but we aren’t worried about that one at all so we’re pretty happy.

We’ll also be using some darker bricks for patio columns, both in the front yard and in the back. They managed to get all the walls done except for the spot where our living room patio door goes (it’s on order for the fourth time and is now arriving May 1) and the edges of the two exterior doors in the back yard. The reused bricks/staining worked out great. If you look closely you can tell what’s been done, but from any distance they look really good.

They still need to do some stain work on the back wall and do the columns but that’s all waiting until they come to do around the doors.

East wall with a mix of original and stained re-used bricks (only a subset of the old bricks had to be stained)

Bricks on the larger patio and one of the new garage doors (more on that farther down). We think most of these were original bricks they’d removed from the house during demo.

Electrical

We found a new electrician to finish up the rest of the electrical work as we were unhappy with the pace of electrician #2 (electrician #1 just did the work for the temporary service at demo). We found the new guy (Cesar/Electrition #3) through a Adelberto, handyman/contractor we’ve both used on our houses in the past.

So far he’s gotten the service panels ready for an interim inspection that will allow us to switch to permanent service - hopefully next week (inspection should happen Monday).

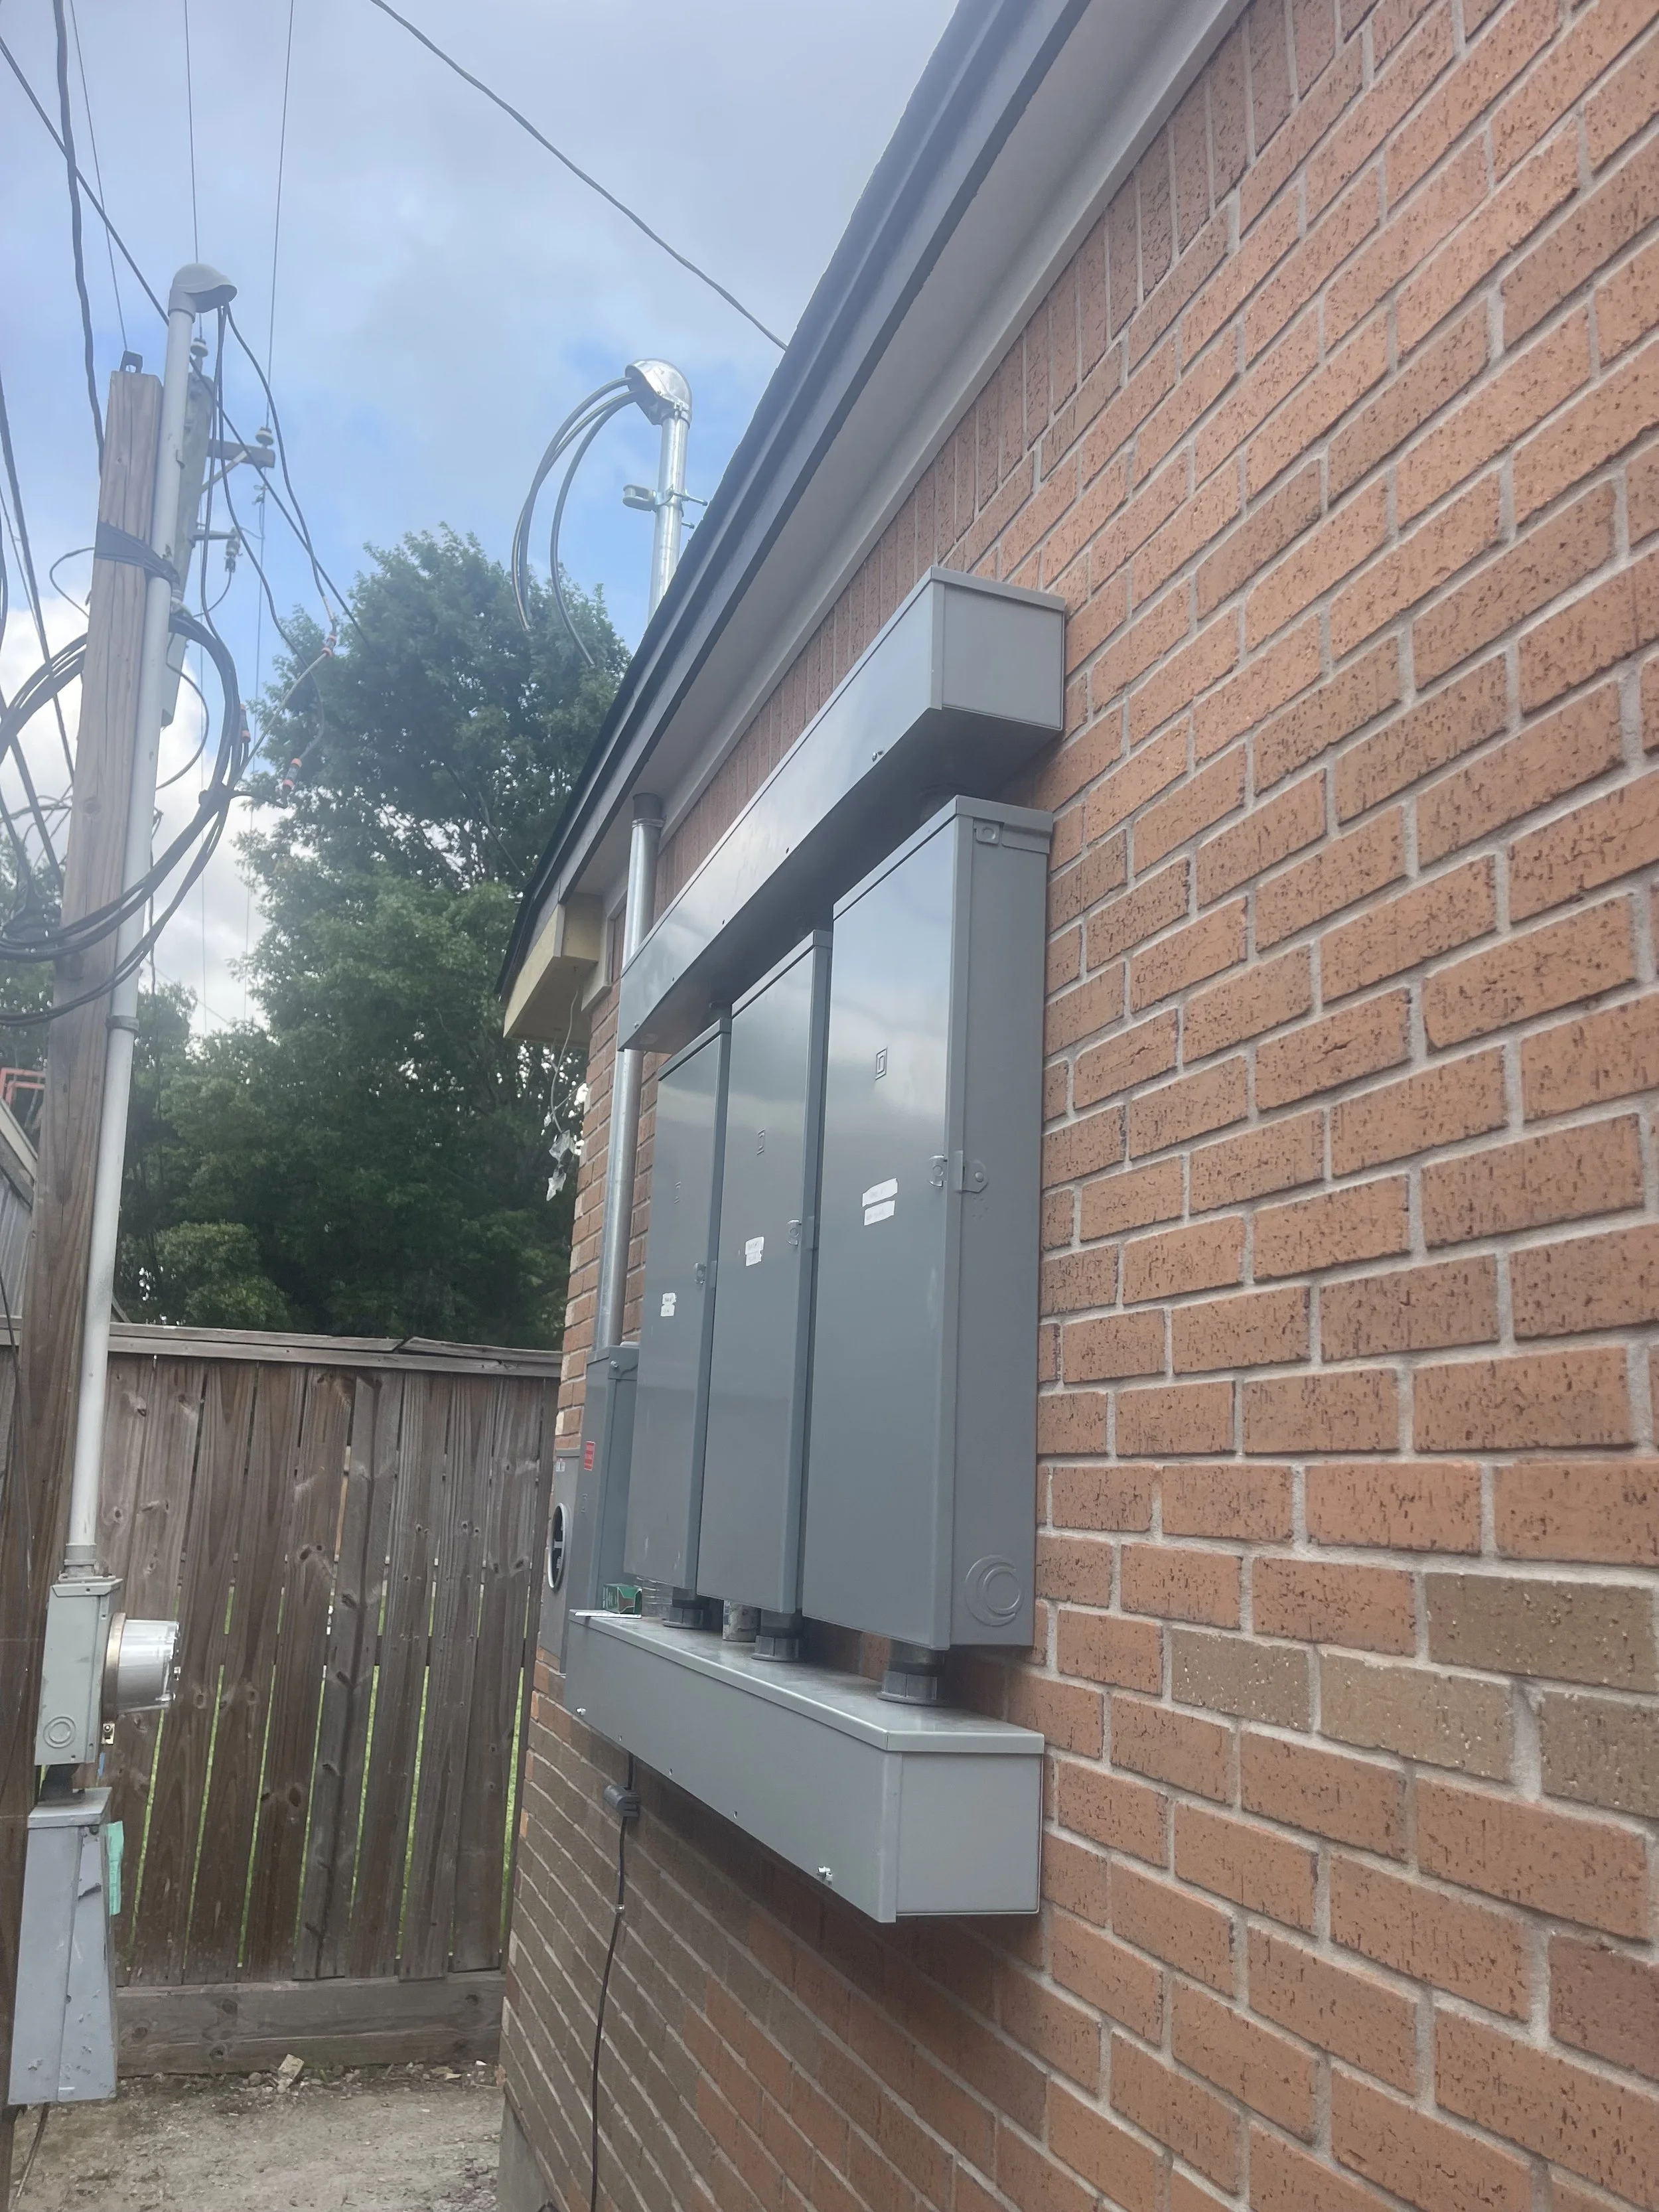
Service panels. On the far end, it the meter box. Then, there is a master breaker, followed by 3 breaker boxes. The first two of these will ultimately be backed up via solar/batteries and the 3rd will have a few thinks that won’t be backed up during an outage.

closets

Once we had sheetrock in, we were able to order closet “systems” (so fancy!!). We had designed what we wanted in the closets quite some time ago and were basically hoping sale would happen about the time we needed to order. As it turns out they were doing a quick 20% off sale for 4 days in early April and after doing some research we figured out we could pay for them and then just call when were were ready for them to ship them and they’d manufacture them at that point. We were able to talk them into 25% off based on keeping track of some sales they did last year. Two of the four closets (primary BR and gym) mount to the wall so we can install them once paint is done. The other two (office and guest BR) are floor mounted so will have to wait until after the hardwood floors are done.

Garage Doors

We ordered our two garage doors through Costco. They were installed this week, along with openers. Those were installed this past Monday. As they were finishing up, we noticed that the window on the bottom panel of the main garage door didn’t match the other three panels. Turns out they mixed two orders at the factory (3 of our panels had stickers with our name on them and the “bad” one did not). They’ll be sending a replacement. For openers we decided to go with wall mounted openers that turn the door spring rod directly rather than use belts or chains. In the main garage, we have such low ceilings, it seemed like not having the open protrude into the room would be helpful. Turns out, they are super quiet. We think we’re going to be really happy with that decision.

The door with the bad panel. Once replaced, this door will be painted black to match the trim.

Paint Prep

Once the drywall was complete, they got started on putting a bond/sealer on the drywall followed by primer. Once the primer was done, it’s really starting to look great. Next week (perhaps tomorrow), they’ll start texturing things.

Living Room after primer with our patio door which will hopefully be replaced late next week (it’s due in May 1). Basically the window that touches the patio door should be the same 8’ height as the patio door. They’re replacing all three sections.

Primary Bedroom

Guest Bedroom

Utility Room

Garage after priming. If you look at the left end of the garage door, you can just see the wall mounted opener.

Upcoming work

We have a lot happening in the next week or so. There should be an electrical inspection on Monday followed by switching to permanent service followed by Cesar starting to bring up circuits one by one. We are unclear on how fast the new service will be connected once the inspection passes.

Interior doors will be delivered Monday, followed by the replacement patio door and hopefully the 3 exterior doors (front door, door from utility room to patio and door into the workshop from bigger patio).

The painters should finish texture work and then the subfloor work will start. We believe that ceiling paint may also be done pretty quickly which will allow electrician to install ceiling lights as he brings up circuits.

Once the exterior doors are installed, the masons will finish the rest of the brick work.

Insulation

The insulation folks finished the spray foam in all the exterior walls (as well as the walls between garage/office and workshop/primary bedroom). Tomorrow they’ll be doing all the batt & blown-in insulation. This is all of the attic space as well as a number of the interior walls (primarily for noise reduction).

Guest Bedroom with insulation

Office with insulation

Kitchen (left) and Dining Room (right) with wall insulation. Ceiling will be fiberglass batting.

Workshop back wall

The exterior brick work will start Monday. The mason was able to find a match for the original brick so we should have a consistent view for everything, except possibly the back wall).

In crazy news, someone ran into the eave again - in the exact same place as before. We think it was the electrician this time. It’s already been replaced. Hopefully for the last time!

Cautiously Optimistic about Progress (Finally)

The last three months were tough. Things just seemed to be dragging. The holidays didn’t help. We also had a 2-3 day freeze that made work inside the open house difficult. Bottom line, our electrical sub-contractor was extremely slow and took almost exactly 3 month to get all the rough-in electrical done for an electrical inspection. We’ve been frustrated, our project manager has been frustrated, and we’re thinking even the electrician is frustrated. On the plus side, we’ve passed that milestone - but do have more electrical to deal with in the future.

Since the last update, the electrical work has been the main event. We’ve ended up spending a bunch of time at the house marking locations of lights, checking their work and answering questions. Travis had developed a “robust” electrical plan and we don’t think the electrician quite realized what he’d gotten himself into. On top of that, Doug had developed an equally elaborate smart switch plan. Because we have several 4-way switches and the smart switches have some specific wiring instructions, Travis introduced a tagging system he’d utilized in his real job during project turnarounds. We’re using two different tags - yellow and red (think soccer). In the 6 or 8 locations where there was some specialty wiring requirements, Travis would create a yellow tag indicating what was happening there, what the wires coming in were for (and their source) and what the outgoing wires were doing. The electrician ultimately liked this system and supposedly has started using it at other job sites as it allows him to provide direction for his workers and not have to be there all the time. He even added an improvement to the system in that he had his folks clip off a corner of the tag when they were complete so he (and us) could see they’d competed that and we could check before removing the tag. Red tags are used to indicate a problem. For example, we have a lot of “can” lights. We found early on that they were putting the junction boxes for those lights too low and they were going to interfere with the light itself when they were added after sheetrock. When we’d see something like that, Travis would create a red tag indicating a correction needed to happen. You can imagine how much they enjoyed seeing us show up at the house. 😁

The garage with way too many red tags!

We are using the same tagging system for the builder also. Glen swears he also likes it as more eyes on things is always good. We think he’s just being nice.

Sometime in January, we finally received skylights we’d been expecting for some time. We’re not sure they’d actually been ordered. Regardless - we finally had the two skylights. They’re not what we’d specified, but are actually a bit nicer in that they open to vent air. They were also slightly a different size but that didn’t end up causing any major issue. They have solar panels to power the open/close feature and to open/close the blinds. Each of them comes with two absurdly large remotes (one to open and one for blinds). Luckily we won’t need to uses those generally as we should be able to control them with Alexa.

The Kitchen skylights.

With all the time we’ve been spending over there doing things, Travis got tired of always needing thing and put together a work uniform. It’s basically a fishing vest with lots of pockets where he stashes everything he needs to carry. Doug might suggest there are too many pockets as sometimes Travis has trouble finding the item he’s looking for. Here’s a video of Travis modeling and describing his “uniform” features.

Last week, we got attic stairs installed. While I don’t think they’re special, they’re nicer than any attic stairs either of us has ever had. We have two sets - one for front half of the house and one for the back half of the house. Despite the nice stairs, the attics are very tight (especially the one in the front). Working on HVAC is not going to be fun at all.

The attic stairs in workshop for the back half of the house

Finally, in preparation for the framing inspection before closing in walls, the plumber installed shower liners, the “canyon” in the middle of the living room that was used for in floor electrical was cemented in, and temporary exterior doors where installed in a 3 places (you can see one of them behind the attic stairs in the picture above.

Shower liner holding water in primary bath

The filled in “canyon”. This actually went across a good chunk of the living room. This is all subfloor. Above this will be tar, some wood screeds, plywood subfloor, vapor barrier and then hardwood floors. All in all the final floor will be about 3 inches higher than this floor.

Finally, we bought a cheapish 360 degree camera so that we could photograph all of the rooms before insulation/sheetrock so we’d know exactly where electrical, plumbing, etc. were. You end up with an image that you can scroll in 360 degrees to see any part of the room. If you go to this link, you can see a layout of the house with locations marked where we did a 360 video (see copy of image below). We did a ton of them (clearly more than anyone other than us will want to see). Once you click on a pushpin, you can get back to the floor plan by clicking on the icon in bottom right that looks like a floor plan.

Click on link in the paragraph above to go to the website with all the 360 photos

Slow Going

Sorry we haven’t posted in quite some time. Unfortunately, things have been moving very slowly, and the things that have been done haven’t been very interesting or photogenic.

In the last couple of months, all of the rough in plumbing has been completed for both water and natural gas. The goal had been to get everything that causes a roof penetration completed so that the new roof could be installed. As such, the plumbing rough-in was completed, including roof vents. The two furnaces were installed along with all the HVAC duct work, as well as venting for hot water heater, dryer, bathroom vent fans, and kitchen vent fan.

Exciting photo of living room HVAC ducts and dryer vent!

Home Depot finally found the replacement patio door panel that had been delivered to the store more than a month ago. That’s been delivered to the house now and should be installed any day now.

Electrical rough-in has also started with electrical boxes installed throughout the house and wiring run to maybe 40% of those so far. Most of the exterior boxes still need to be installed as well as all ceiling electrical (fans and ceiling lights). We’ve marked specific locations for all the bathroom vanity outlets and wall sconces for the electrician. Travis had developed a detailed electrical plan with detail down down to what items are on which circuit. It also includes specialty wiring for security cameras, alarms, audio/visual, patio heaters, etc. As such, we’ve been over there a number of times going through that with the electricians. We found ourselves needing to mark various things and Travis ultimately bought a fishing vest to carry all the stuff he needed while over there (tape measure, various writing instruments, notepad, laser pointer, flashlight, etc.). He may like his vest just a little too much!

Travis consulting with Ishmael, one of the electricians

We ordered vanities for the powder room and guest bathroom from a shop on Etsy. Those arrived a while back and we like them so much we may order the vanities for the primary bath from the same people.

Guest bath vanity currently sitting in builders warehouse

Powder Room Vanity

Over the past couple of months, we’ve also finalized a number of things:

  • All ceiling and decorative lighting

  • Countertops throughout the house

  • Tile selections (may still need to do a bit of work on bar backsplash)

  • Roof Shingles

  • Interior/Exterior Door Hardware

The new roof was installed on Wednesday and looks really good. Unfortunately, on Thursday, the Porta-Potty vacuum truck backed into the eave over the garage door and broke a piece of fascia board and bent up the day-old drip-edge.

New Roof

A day later after getting “T-Boned” by the Porta Potty truck.

Life Sometimes Gets in the Way of Posting

Sorry it’s been so long since we’ve posted anything. Doug has been working towards selling his house. In August and early September, he was doing lots of packing. He moved out of the house September 8th and into Travis’ house (with a lot of stuff going into storage). We went on vacation for a week in mid-Septemeber. Through last Friday, Doug’s been working with a contractor to paint the interior, do various other minor repairs and refinish the floors on most of the stairs and the main living floor, and replace the roof. The closing for the house sale was on Friday so that’s done and he’s glad to have some semblance of a normal life again.

During that time, things have been moving slower than we’d like on the new house. We had to go back and see where things were on the last post to determine what’s changed:

  • All the eaves have been completed and painted.

  • The roof decking has been installed along with the stuff they use now rather than tar paper.

  • All the plumbing rough in has been completed.

  • The plumber has trenched from the house to the water meter to replace our supply line.

  • We’ve made a few minor changes on doors and the framing has been updated to reflect that.

  • We’ve worked with the builder and an HVAC company to sort out requirements there and are expecting details on that by Monday.

  • Framing for a design element on one kitchen wall and one living room wall has been installed.

  • Framing in attic for access to ACs and hot water heater.

  • Holes have been put in the roof for two sky lights that will go in the kitchen.

  • We’ve finalized our tile choices, except for the backsplash on the bar wall.

  • We ordered some custom vanities for the guest bathroom and powder room. The vanities for the primary bath will be built on-site.

  • We selected bricks for the back of the house for the parts where we didn’t have enough salvaged from the original house to backfill.

  • We’ve finalized lighting choices for the whole house.

  • The replacement windows arrived and one of them has been installed.

  • The 2nd replacement window as wrong and Home Depot and Andersen Windows have supposedly sorted that out and another replacement is on it’s way.

All in all, things are moving slow. We know once the electrical gets in, things will really pick up, but seems like we’re a ways off from that. We’ve attached some recent pictures below.

Doug’s stuff in storage (along with some appliances for the new house)

Eaves and roof decking in progress

The larger of the two backyard patios

Skylight holes

Wall that will go up and over one end of our kitchen

Plumbing rough-in for guest bathroom

Plumbing rough-in for primary bath shower

Updates should happen on a more regular basis going forward!

Finishing Eaves & More Windows

Things are starting to move quite quick. On Monday, the guys started finishing out the eaves with Hardie products. That’s looking great. At the same time, all the windows that we have onsite were installed. We’re still missing 3 windows. Home Depot has received them but seems to be struggling to locate them. Finally, the plumber was there knocking out vent pipes and drain connections. There’s a lot going on!

Here are a couple of pictures of the windows. I forgot to take a picture of the eaves.

Living Room windows. The gap in the middle will be a 12ft sliding door (three 4 ft sections).

Dining Room (right) and Kitchen (left) windows.

Crazy People

One of the things we’ve been planning for the new house is to have downlight in the eaves. A ton of our neighbors in the area have done it and we really like the look. Travis had done a bunch of research and decided on a particular light and has mapped out the locations around the house where we’ll put them. What we didn’t know for sure is where exactly on the eave they’d go relative to the wall (i.e. close to the brick or more towards the edge of the eave. Consequently we found ourselves at the house last night in the dark trying out various locations to determine the optimal distance. We’re pretty certain that most of our builders customers don’t do this type of thing - probably because they aren’t crazy.

The permanent ones won’t have wires hanging down like that. 😁

In case you’re wondering, we decided that the center of the light should be 20” from the brick.

Soffit & Fascia Work

Framing continues. All the strapping and hurricane clips have been done and really main thing left is to do the eaves. The mid-century ranch style of the house has wide (24”) and low eaves (basically at the tops of the windows). This will continue with the addition, although because we’ve gone with 9’ and above ceilings in the back, the eaves will have to be higher to accommodate that. It appears that they’re about 85-90% done with the eave framing. Once they finish that, they should be starting roof decking, putting house-wrap on siding, installing rest of the windows, etc.

We were also a big surprised when we went by this afternoon that they’d removed the old garage doors and put in the beam to provide support for the single double-wide garage door. It’s fair to say that the house is quite open to the elements these days.

New beam for the double garage door

We also had “fun” today with a bunch of moving activity. We were in Rejuvenation a couple of weeks ago and saw a floor model table that we both really liked. It was heavily discounted and really matched what we were looking for so we ended up buying it. It didn’t come with chairs but we have lots of options there so will do that closer to move-in. Because it was a floor display, they wouldn’t deliver it so we had to deal with that ourselves. We had taken Travis’ existing table to the lake this last trip so the plan was to put the new table in his dining room until we move into the new house. The table is slightly too large for his dining room but it will work for now (we haven’t moved any of his chairs to the lake yet, but will do a couple at a time each trip).

Meanwhile, Doug had offered some of his patio furniture to our friend Jean and Travis was giving one of his bedroom headboards to our friend Dan (it’s a queen size and we only plan king beds in the new house). Given we were renting a Home Depot truck we decided to take care of all of that in one day (they charge by the hour). Travis got the clock running when he picked up the truck at Home Depot at 8:52AM and drove to Doug’s where we loaded up the patio furniture. Next stop was Jean’s to drop that off and get it set up in her backyard. Then off to the store to pick up the table. We spent quite some time (30+ minutes) moving the table outside and protecting it with furniture blankets and shrink wrap before getting it loaded up and on our way to Travis’. We squeezed it into his dining room and got it unwrapped and then headed to Dan’s with the headboard. Luckily all of this was relatively close and we were able to get it all done in just over 3 hours. We both reconfirmed that we don’t want to be furniture delivery people as a second career.

Framing & A Window

Framing has continued over the last week. They’re far enough along that there are no longer any braces on walls. Everything is tied into the steel framework and they’ve started adding sheathing on the outside. It’s at a point where it seems much closer to a house than just a bunch of 2x4s that you can see through.

They still have work to do where the old roof meets the new roof and they need to build out the soffits on the new roof. Apparently today they’ll be strapping and installing hurricane clips. The soffit work will start next week.

In a surprise, when we went by last night, they had removed the three remaining original windows and had installed one of the new windows in the guest bedroom. The darker color looks so much better than the white ones with the brick on the house. They also enlarged the other window opening on the front of the house (in the office) and we really like how much a different that makes in that room. They plan to install the other two windows on the front of the house, but have to wait for all the others until after framing inspections and they install the tyvek stuff.

The new window in the guest bedroom and the larger opening in the office.

View of the larger patio int eh back yard. The large opening on left will be a glass garage door from workshop out to the patio. The opening in the middle will be a standard exterior door into the workshop. The large opening on the right will be an 8’x8’ patio door from the primary bedroom out to the patio.

This is the smaller patio in the back yard. The opening will be the door from the utility room out to the patio.

New of the primary bedroom from patio door. The smaller room on back left is the closet. The opening in the middle goes to the primary bathroom.

A picture of the larger patio taken from the corner. Gives a better view of what roofline in there will look like. We’ll have a ceiling fan and a couple of roof mounted gas heaters.

View of living, dining, kitchen space taken from corner in kitchen. You can see where the new foundation meets the old foundation just to the right of the pile of sheathing covered by the plastic in the middle.

Walls Walls Walls

While we were in Canada enjoying cool weather and mountains, work got started on framing walls. Essentially all the walls are framed with only door entries to be adjusted to actual door sizes. All the patio doors and window openings are framed out.

Tuesday this week they are making a few adjustments we identified (some their mistakes and some changes just identified as we saw walls). They also will have a steel fabricator onsite to build the supporting structure for the main beam in the living/dining/kitchen space. Roof framing will also start this week and likely go one through end of next week. it’s great to see progress and much easier to picture things when you can walk through the spaces. We’ve got some pictures but in photos it’s a bit hard to identify things through the sea of framing studs.

In the mean-time, we’re working again on trying to find tile and light fixtures. We both seem to be over-saturated with potential ideas.

This is a view of the Living/Dining/Kitchen space - from kitchen corner facing towards the windows & patio door to what’s left of our backyard. The pipes sticking up out of the floor are where the kitchen island will be.

This picture is from one backyard patio facing the larger backyard patio. The front half of the space across the wet pit is patio and the workshop is behind it with a large opening for a glass garage door and then a standard exterior door on the right.

This is primary bedroom from the door. The large opening across the room is a patio door going out to patio in photo above. In the back you can see the closet that runs along the back of the room.

This is the primary bathroom taken from inside the linen closet. You can see the toilet plumbing in the water closet on the left. The pool of water next to that is where the shower will be (it’s recessed as the shower will be curbless. The pipe sticking up in the upper middle is where a freestanding tub will go (in front of the window). There will be vanities all along the wall on the right.

This is a photo of the gym. The door into the room is on the left (with the door to primary bedroom just beyond that). The closet for the room is just to the right of the door with the linen closet for primary bath just beyond. The primary bath is in the background.

This is a picture of the utility room from the hallway door. The powder room door is on the left and the opening beyond that is for a fridge. The right wall will be all cabinets, washer/dryer, and “lockers” with a bench for putting on shoes. The First head directly in the middle is the old exit to patio and that will go away along with the supporting posts on the left of it. The door on the far end goes out to the smaller patio. Just in front of that on the left is a door to the garage that isn’t visible right now due to the old framing. The floor in here is a hodgepodge and will be leveled (and some of it chipped up) prior to tiling.

We have a Foundation!

The foundation has been poured (placed)! They started first thing this morning and were done early afternoon. They’ll continue to wet it down over the next couple of days to help with curing.

It ended up taking just over 5 trucks which was right in line with what Glen had calculated. There will still be a bit of minor leveling to be done in living room and the utility room but that will be quite minor.

Sounds like material will be delivered tomorrow or Friday and they’ll start framing on Monday. Glen expects that to take up to four weeks but we expect that by the time we get back from Canada in 2 weeks all the walls will likely be up.

Top photo is after all the concrete is in place and they’re doing finishing work. Bottom photo is after the fifth truck while waiting for the last to arrive.

Concrete Ready!!

This week has all been about wrapping up preparation for the foundation of the addition on the house. The team did a lot of digging and brought in fill. On Wednesday, a pest company did a termite treatment of the soil under the new foundation (they’ll also treat all the studs down low where they come into contact with foundation after the framing is done). Rest of the week was guys putting in a bunch of rebar to form the structure of the foundation and also drilling into the old foundation to epoxy rebar into it to tie the old and new foundations together.

Monday is a holiday so the city inspection of all that will happen Tuesday and then on Wednesday there should be a stream of concrete trucks pouring (placing) the concrete and by Wednesday evening we should have a full foundation! After a couple of days (We’re guessing the following week), crews should start framing and we’re hopeful that at that point, things will start to move quite quickly.

From the back corner of the lot. The grassy area to the left of the pile of bricks is where our small yard will be.

Each of the orange dots is where they’ve drilled into old foundation to do the tie-in with new foundation. The door in the middle will be the door from the garage into the utility room (which will extend to the left past the garbage bins).

This corner will be the primary bath (which ends up needing to be slightly higher since it won’t have hardwood floors). There ends up being several different elevations here. the shower (the rectangle in the middle with the single pipe sticking out of it) will start out lower than the rest of the floor so that they can finish it out as a curb-less shower.

They’ve also had to put rebar back into the places in the original foundation where they had to dig out for new plumbing.

Under-Floor Electrical

Before foundation can be finished, there is electrical being added in a few locations where it will need to come up in the floor. In the living room we have three outlets in the floor and in the kitchen there will be power in the island for both the dishwasher and outlets on the sides of the island.

This week the electrician has been cutting out existing concrete to make enough room to get electricity for all those locations. He hasn’t actually installed any cables, but has installed conduit and outlet boxes that will all be in the concrete that’s poured (placed) soon. The conduits just have pull ropes in them to facilitate pulling electrical cables through them.

All of that was inspected by the city today and is good to go.

The pipes sticking up are where the kitchen island will be. The red & white tubing is Pex water lines for the island. The two large PVC pipes are for drain and drain-vents. The small grey pipe (conduit) is for electrical.

The three yellow caps are covers over the in-floor electrical receptacles in the living room. The part with the yellow cap on it will be moved up or down as appropriate once they start refilling the gaps with concrete (and this floor is slightly too low and will be floated higher to match other parts of the house. The other ends of the conduits end up in walls.

On Monday, the foundation folks will start installing the rest of the structural components (rebar) of the foundation. That should take a good chunk of next week and the current plan is for an inspection on that as soon as next Friday. Once the inspection happens, they’ll do the concrete work as quickly as possible (perhaps as soon as Saturday, but more likely the following Monday). Right now the weather forecast is looking pretty good for next week so hopefully this “best case” plan works out. We’re really excited to get the foundation done as things can really start moving much quicker once that’s in place.